

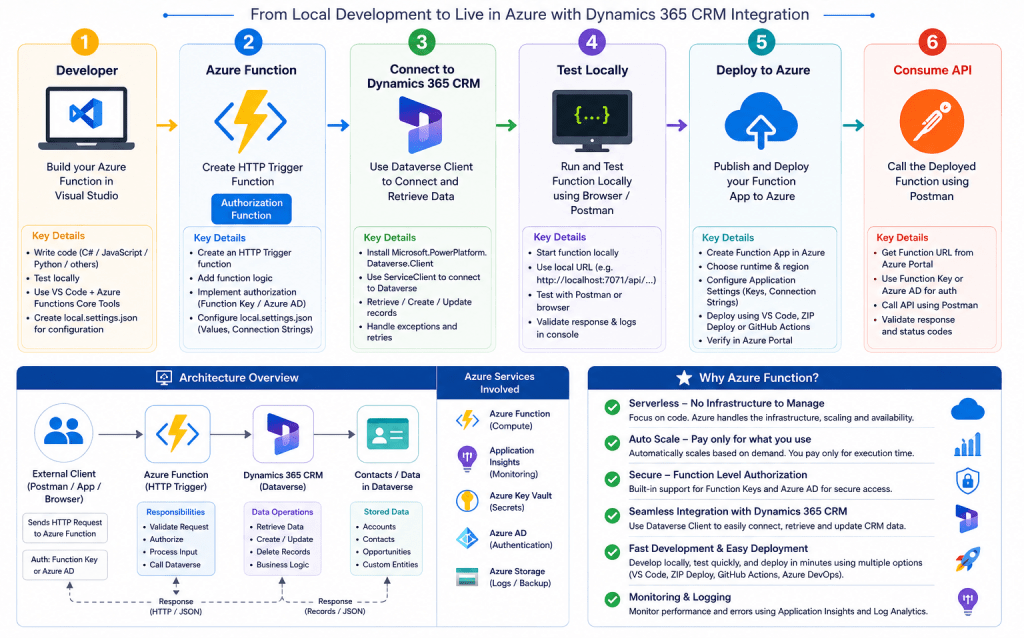
Azure Functions is a serverless compute service from Microsoft that lets you run code without managing servers.
What is an Azure Function?
An Azure Function is a serverless computing service provided by Microsoft in Microsoft Azure that allows you to run small pieces of code (called functions) without managing servers or infrastructure.
Azure Functions, you mainly focus on:
- Writing code
- Deploying code
- Running APIs or background jobs
Azure automatically manages:
- Infrastructure
- Scaling
- Hosting
- Monitoring
Common Use Cases of Azure Functions
Azure Functions are widely used for:
- APIs
- CRM integrations
- Automation
- Background processing
- Event-driven integrations
Prerequisites for Azure Functions Development
Before starting with Azure Functions in Microsoft Azure, make sure you have the following prerequisites installed and configured.
- Azure Subscription
- Visual Studio 2022
- .NET SDK Installed
- Azure Functions Core Tools
Install Visual Studio 2022 with Azure Development
Step 1: Download Visual Studio 2022
Download Visual Studio from the official Microsoft website: Visual Studio 2022 Download
| Edition | Usage |
|---|---|
| Community | Free for learning and individual use |
| Professional | Professional development |
| Enterprise | Enterprise-level features |
Step 2: Run the Visual Studio 2022 Installer.
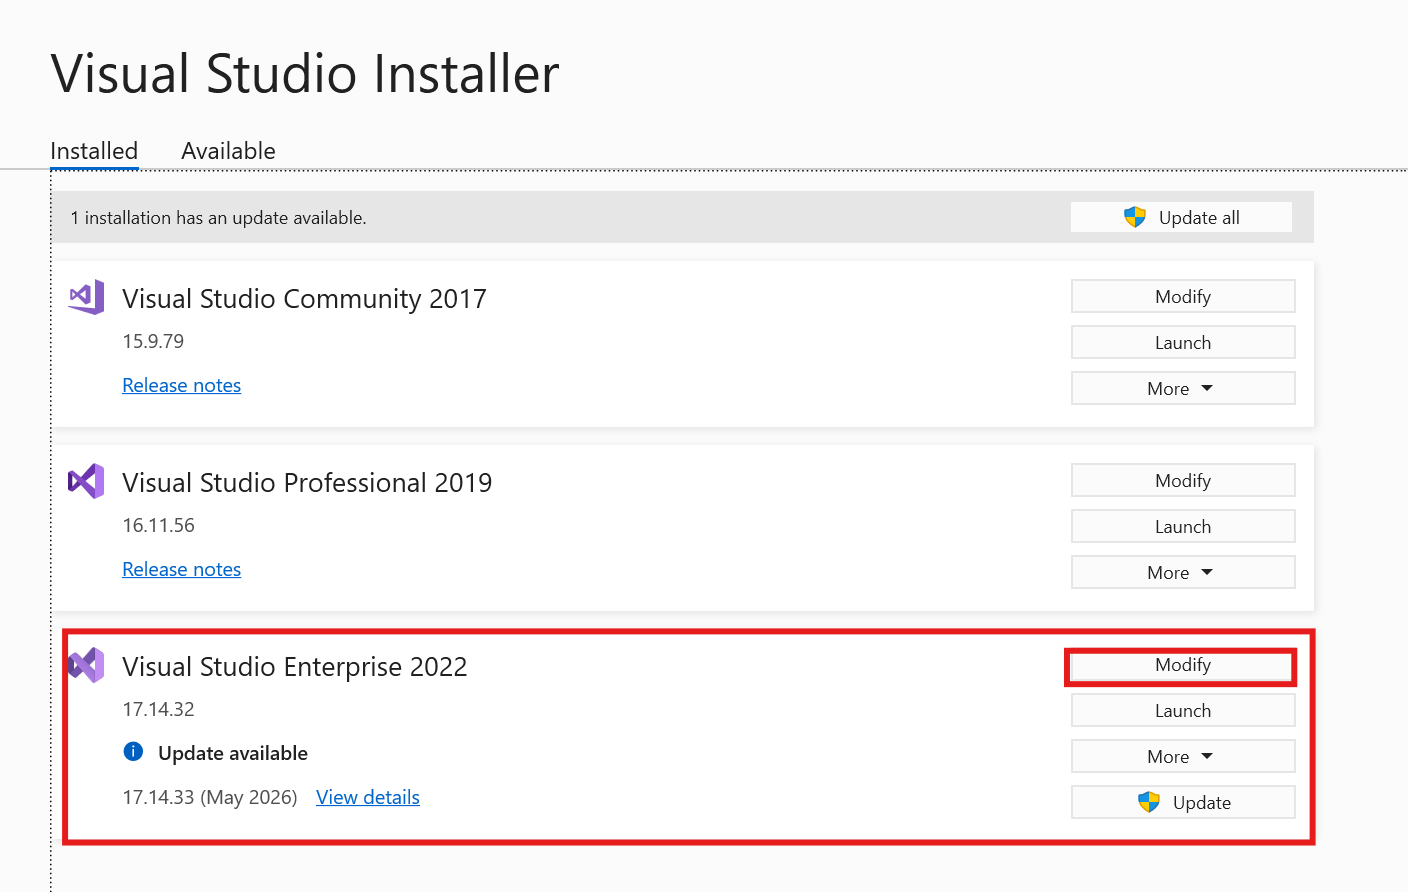
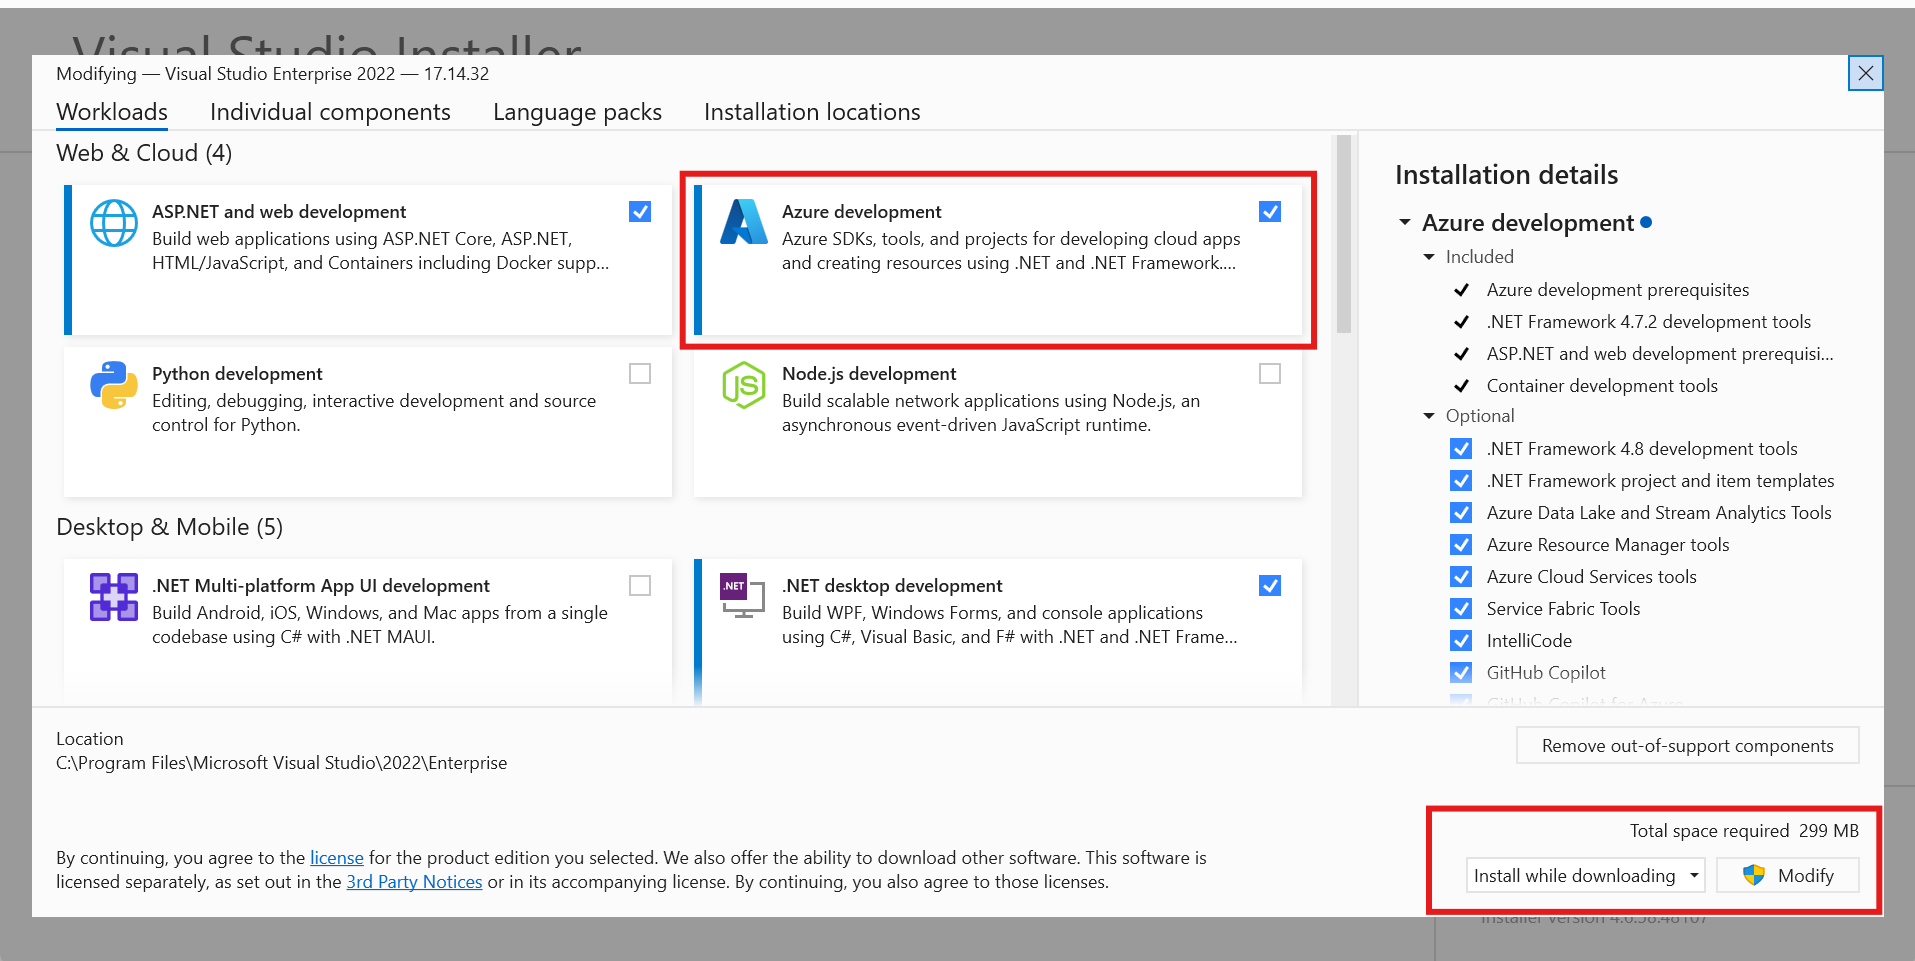
Step 3: Select Azure Development.
This installs:
- Azure SDK
- Azure Functions tools
- Storage Emulator support
- Deployment tools
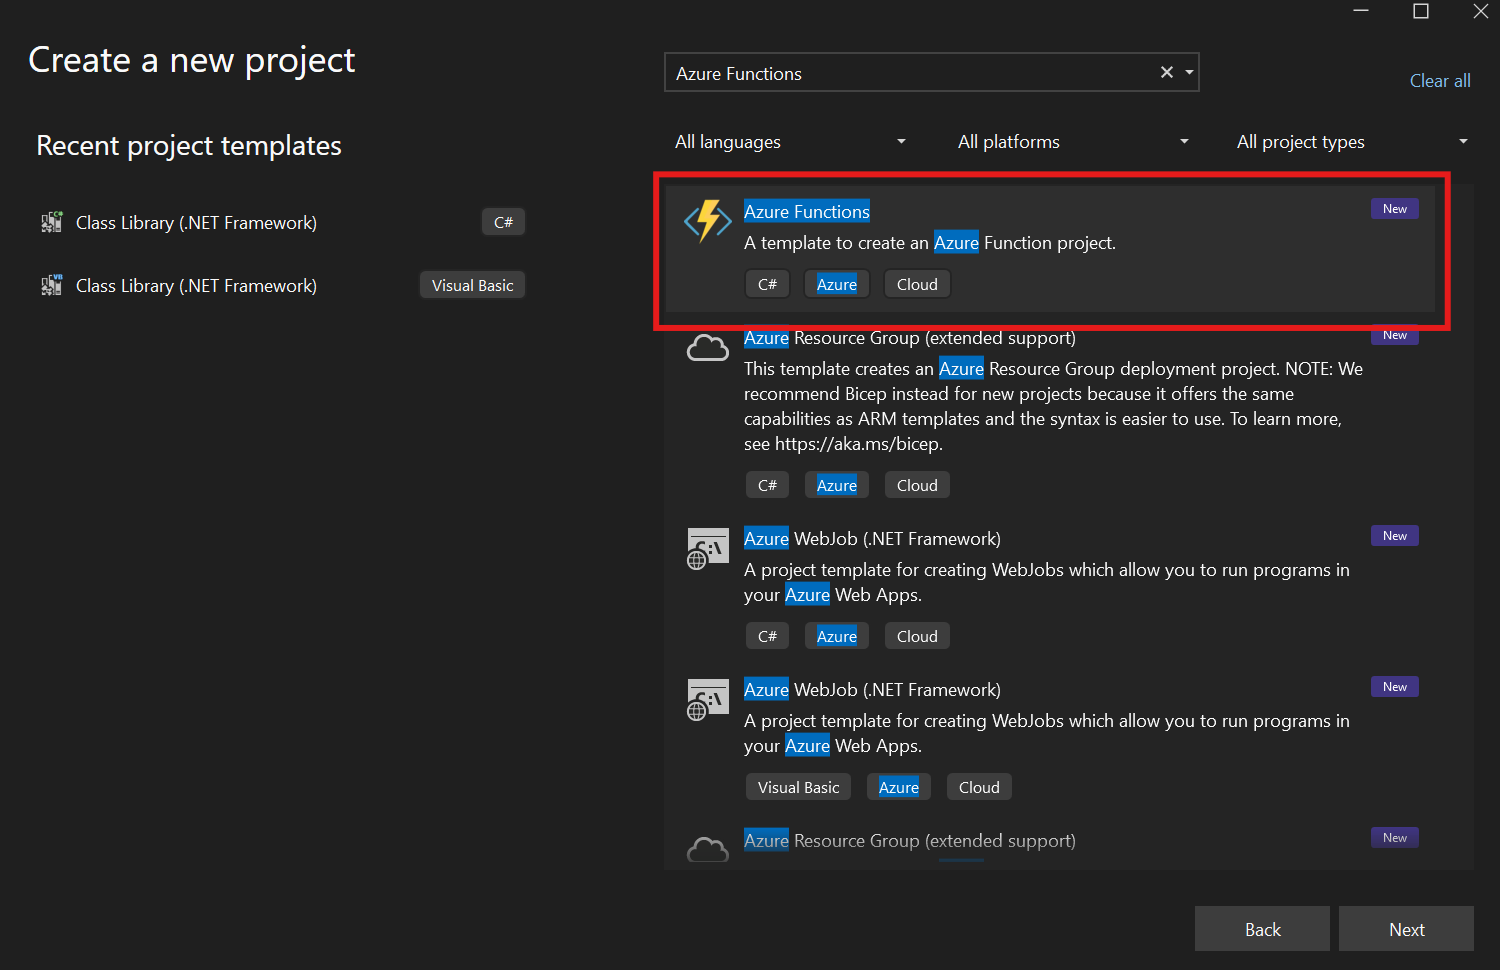
Step 4: Verify Installation
Open Visual Studio 2022, click on “Create a new project,” and search for “Azure Functions.” If you see the Azure Functions project template, installation is successful.
Azure Functions Template
You should see templates like the following:
- Azure Functions
- HTTP Trigger
- Timer Trigger
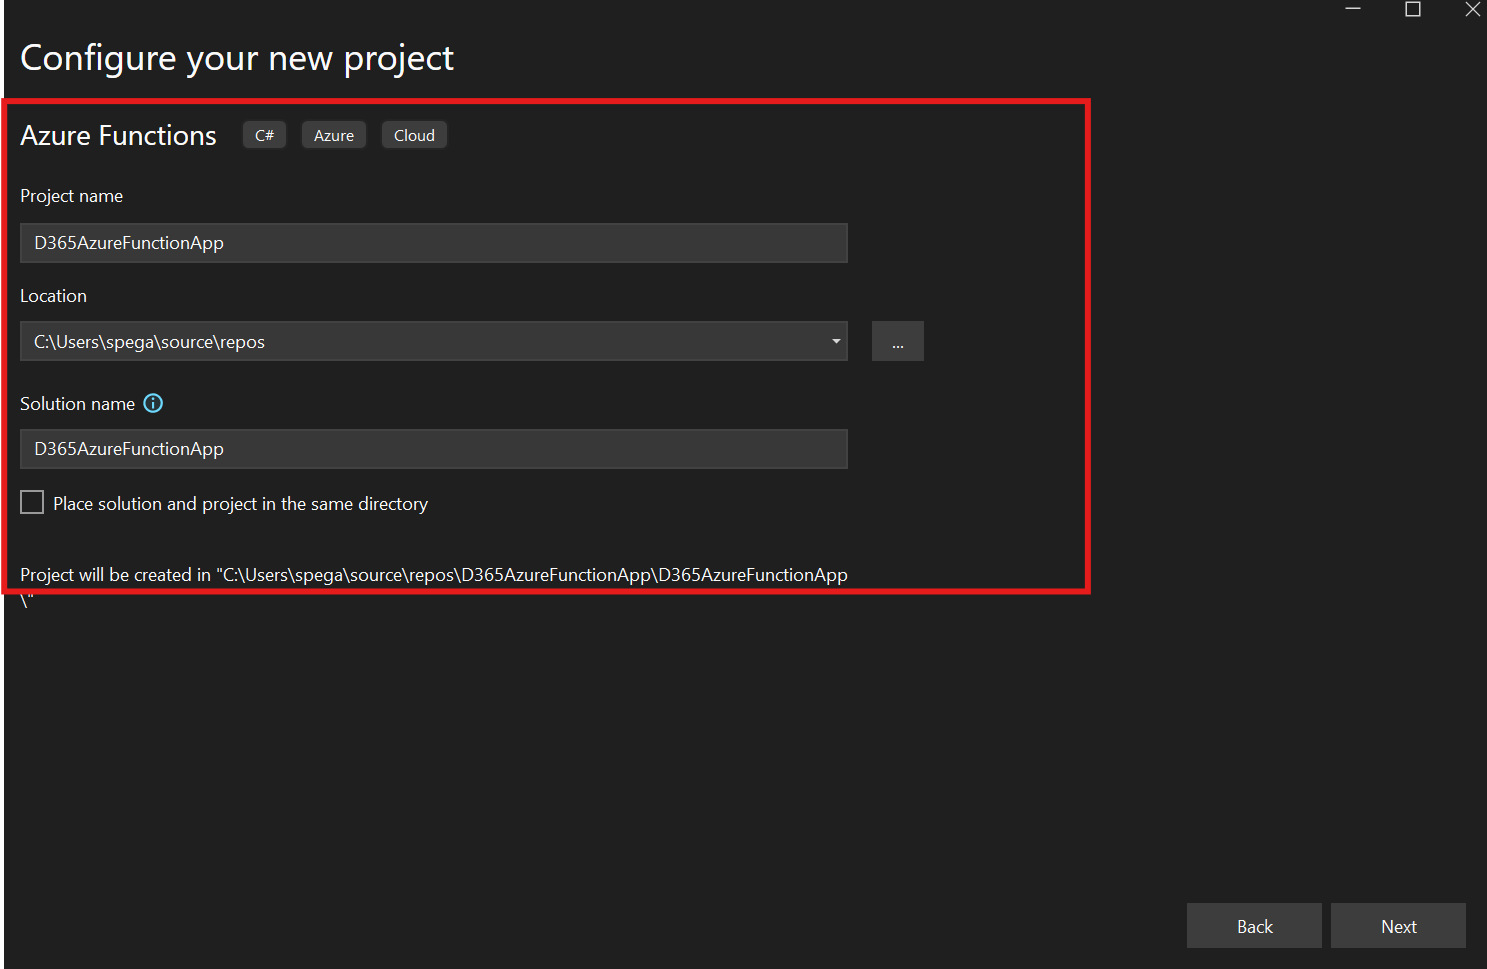
Step 5: Configure Project
Authorisation Level = Function
This provides basic security for your Azure Function API by requiring a function key to access the endpoint.
Avoid using:
Authorisation Level = Anonymous
because it allows anyone to access the API publicly without authentication.
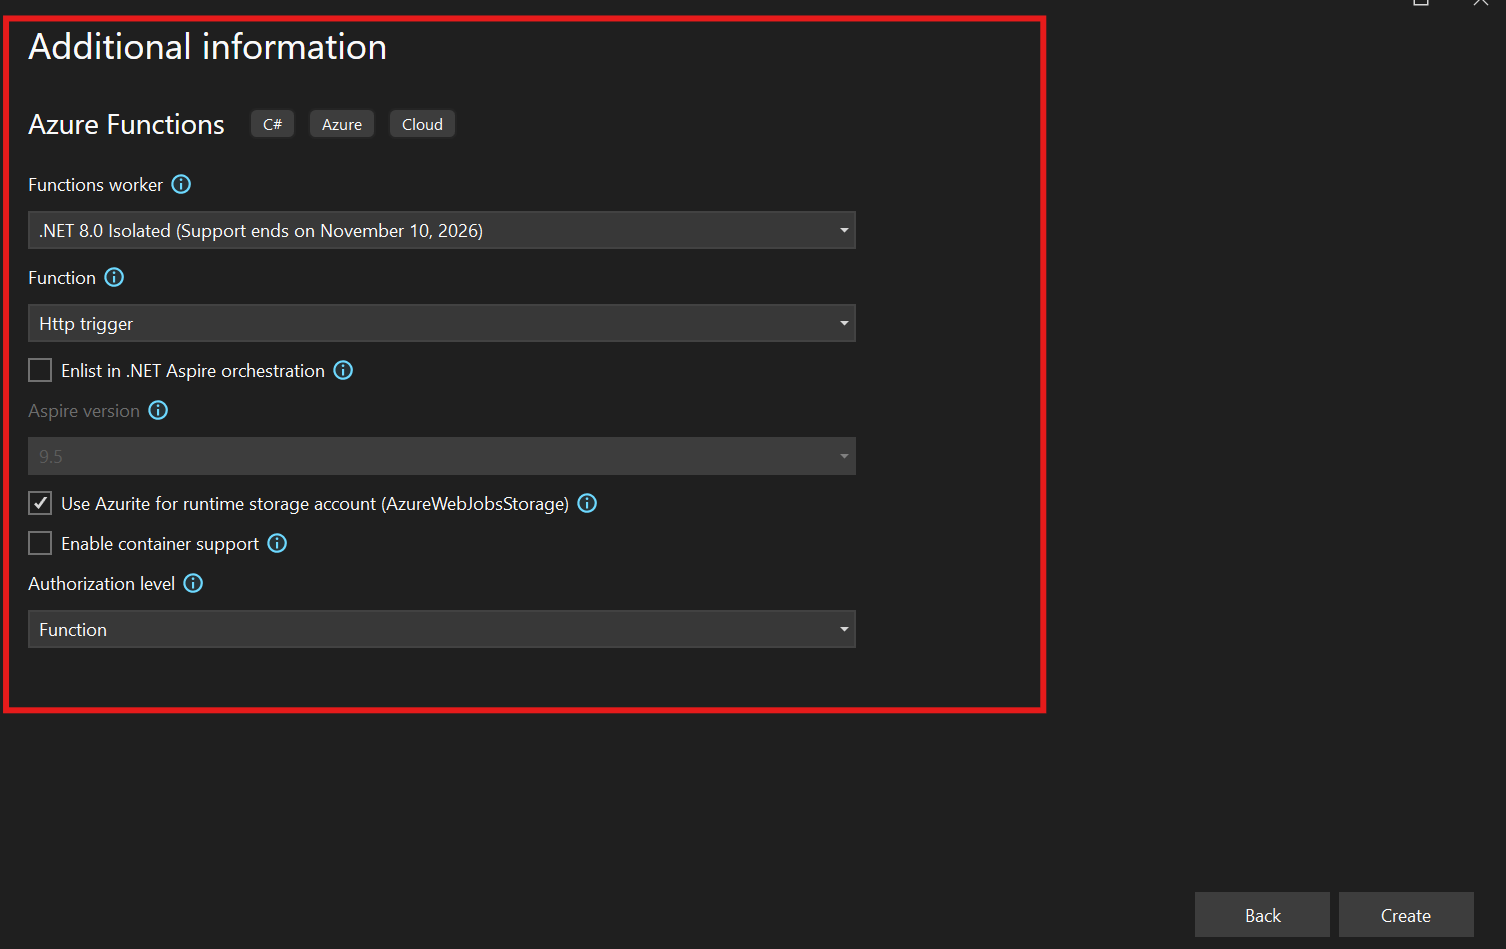
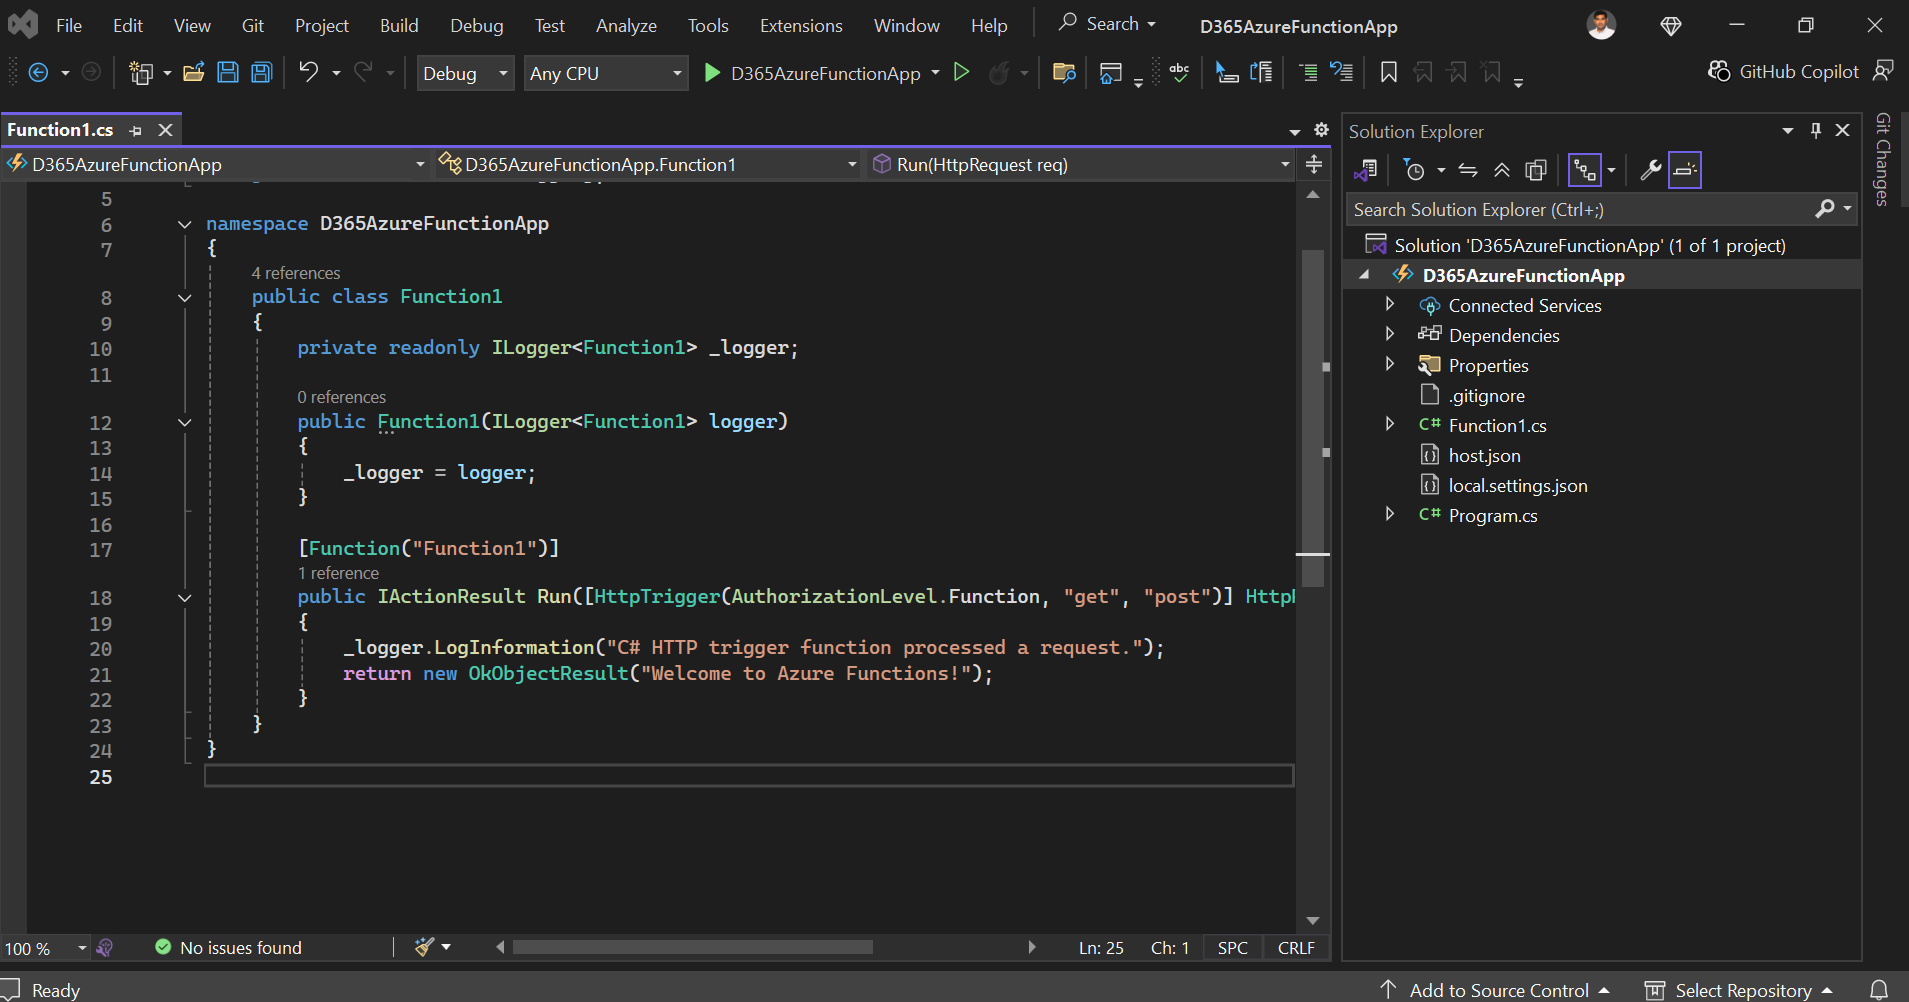
Step 6: Create Project.
Hope you learn something, Thanks for Reading 📖!
Happy Power365ing!

