
Power Apps portals, each authenticated portal user is associated with a contact record in Microsoft Dataverse. Portal users must be assigned to web roles to gain permissions beyond unauthenticated users. To configure permissions for a web role, configure its webpage access and website access control rules. Portals allow portal users to sign in with their choice of an external account.
Google is one of several identity providers that use the OAuth 2.0 protocol.
In this blog, I will go through step by step, configuring the Google Authentication to sign into the Power Apps Portal.
Configuring the Google Identity Provider
- Go to Power Apps Maker Portal.
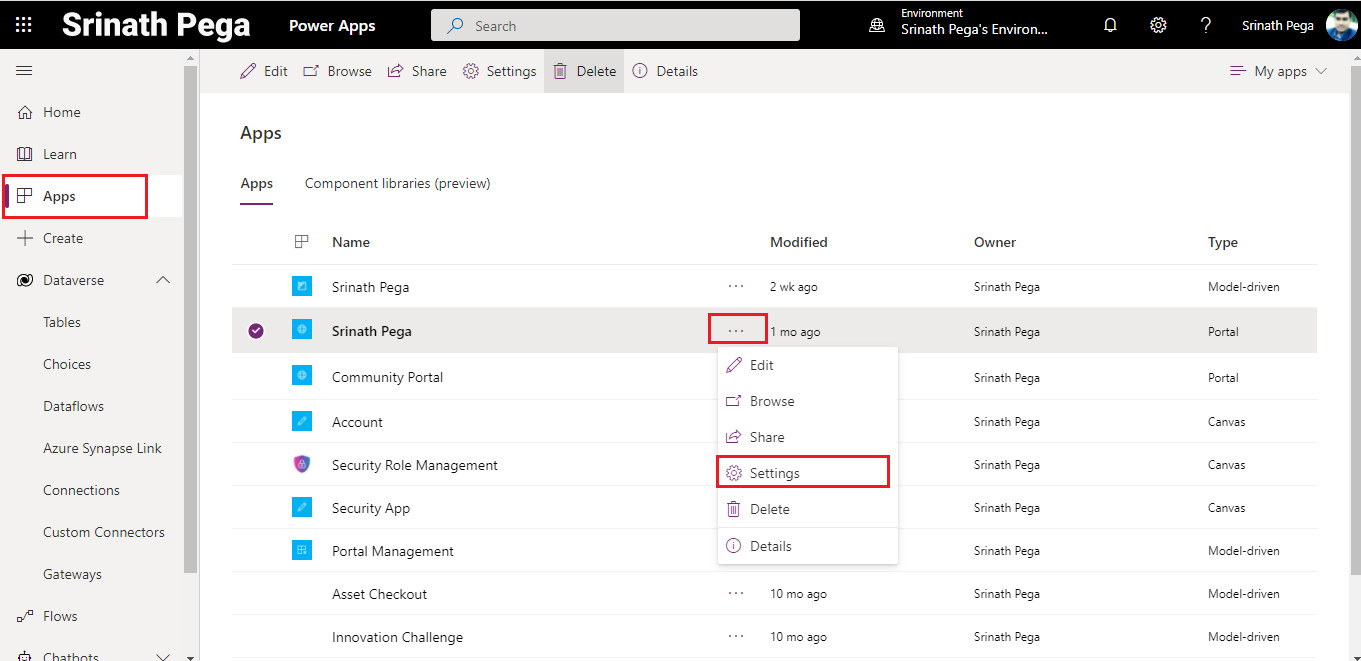
- Click on Apps on left pane. It will shows all the App including the Portals in the environment.
- Select the Power Apps Portal and Click on ellipse then Click on settings.
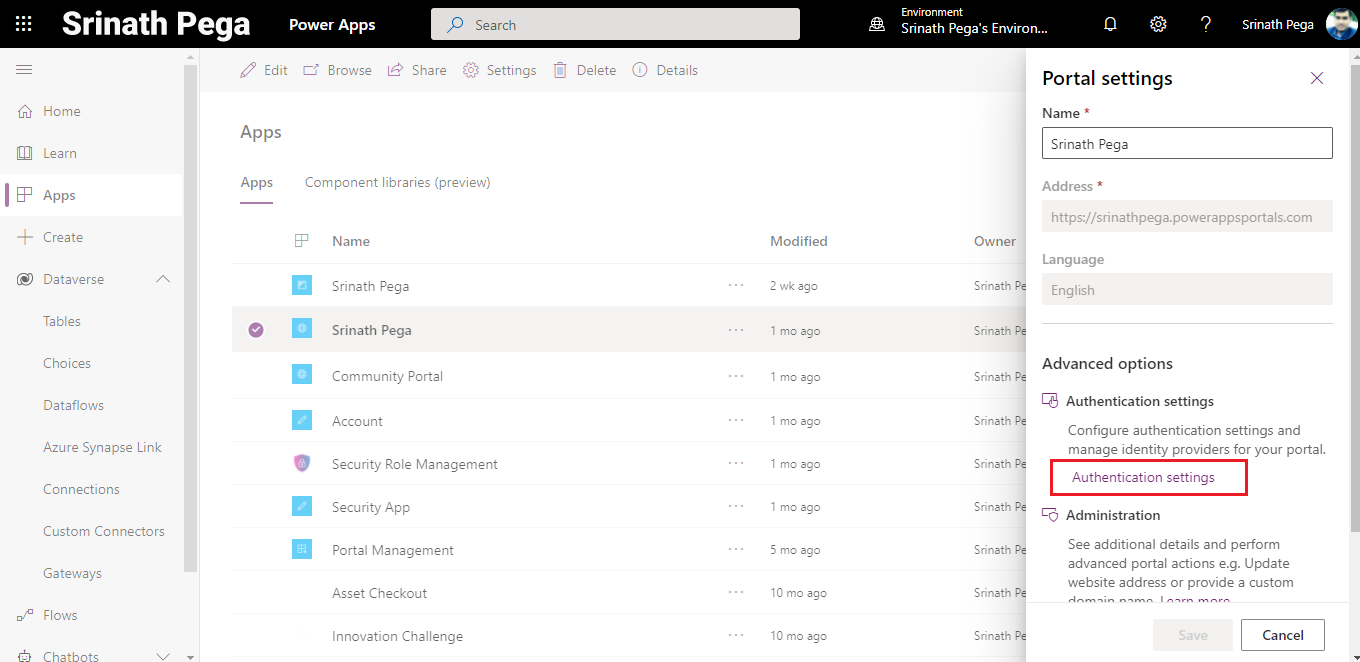
4. It will open the Portal settings and Click on Authentication settings.
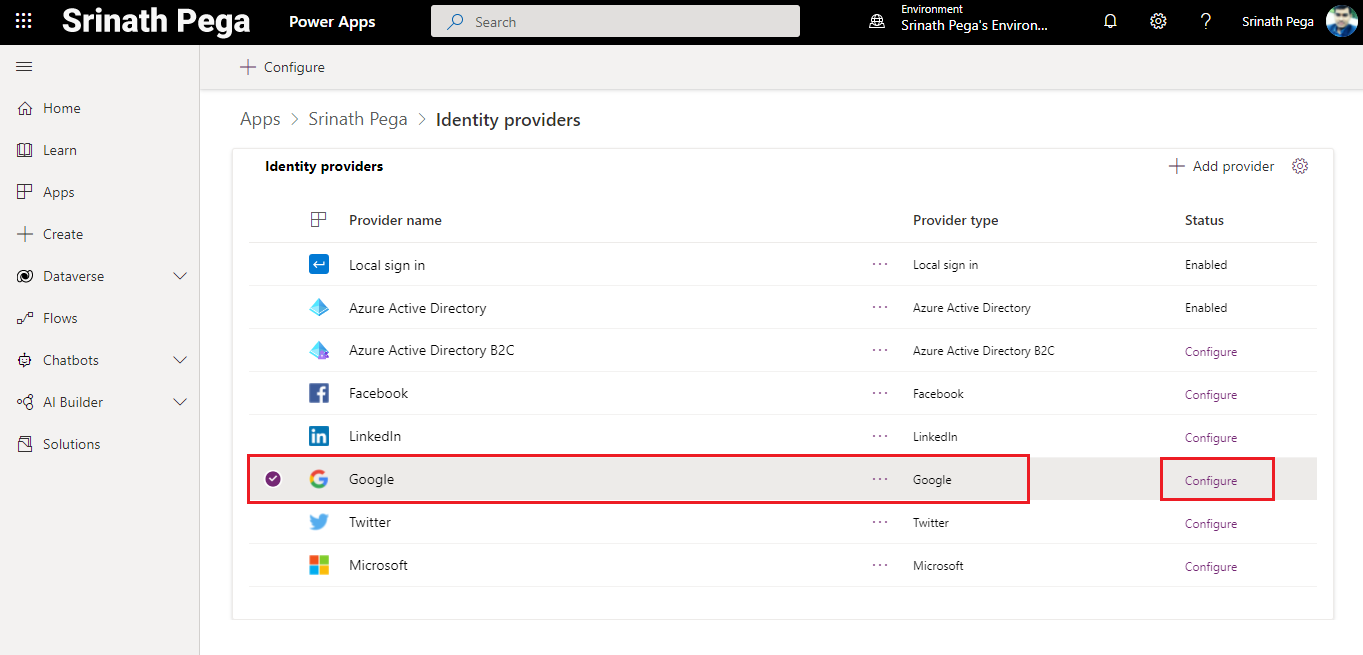
5. Opens the list of identity providers that use the OAuth 2.0 protocol, Select Google and Click on Configure.
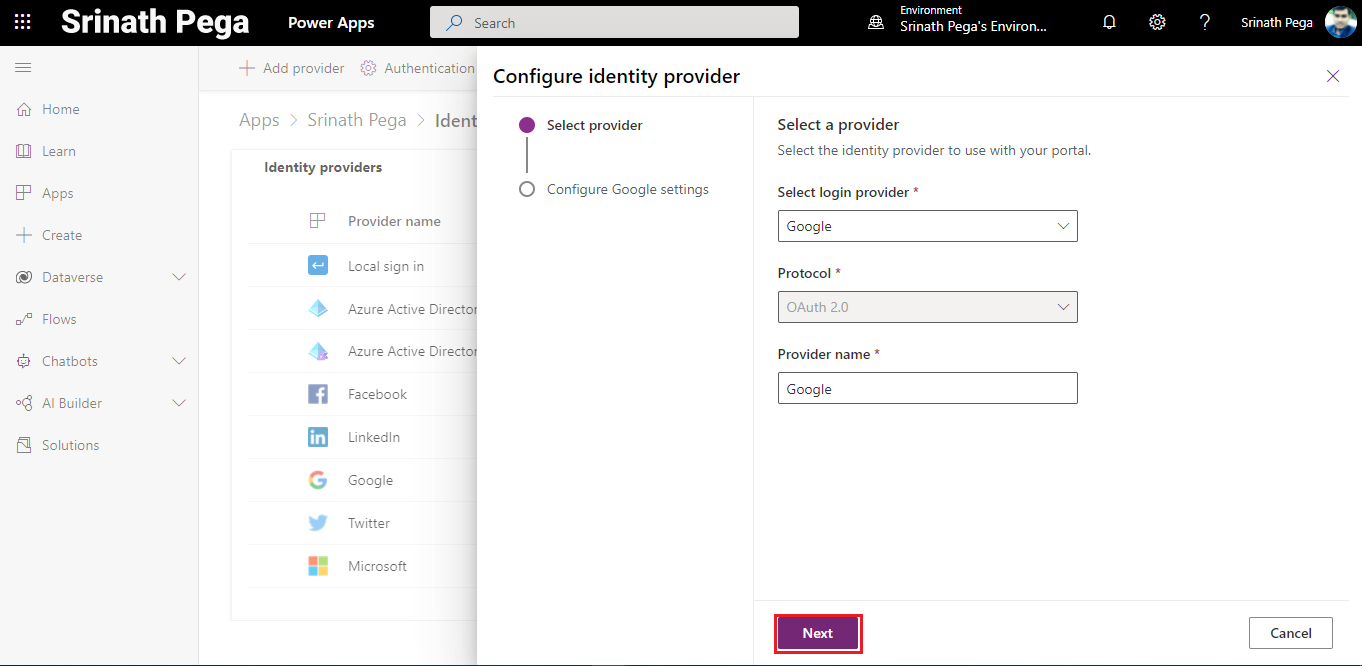
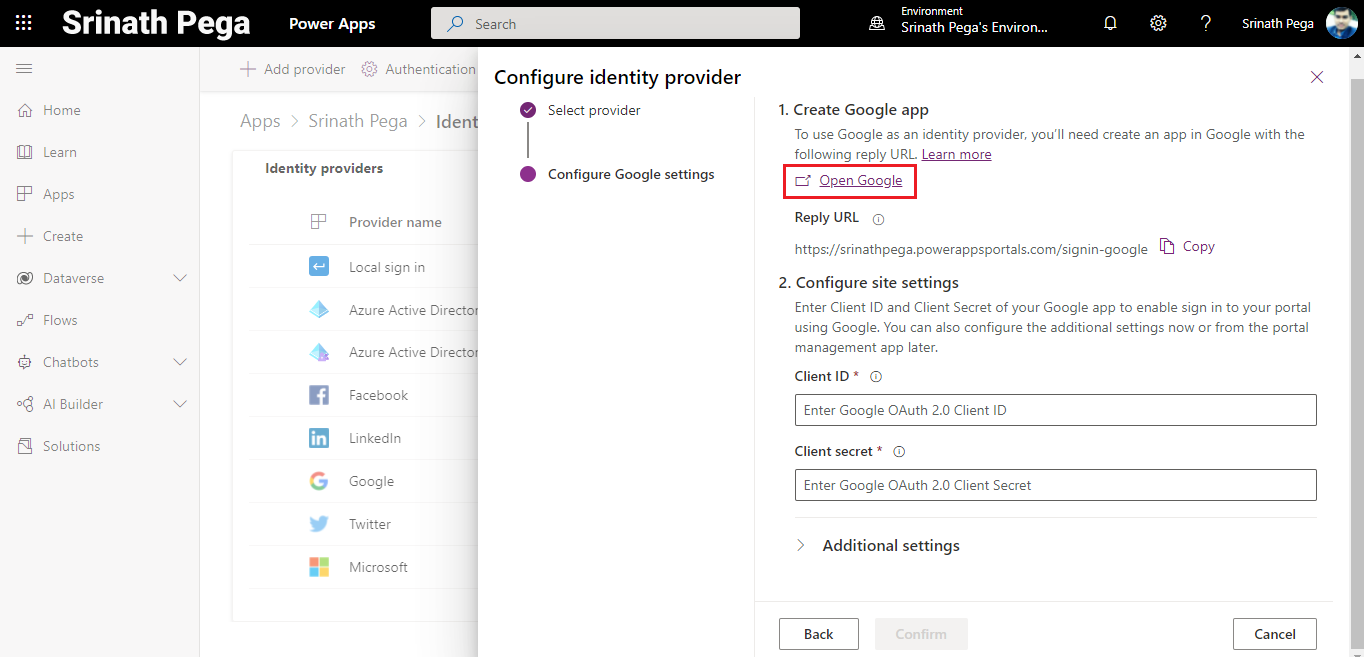
6. Opens Google Configure identity provider Details window, Click on Next.
7. Configure Google settings Window and Click on Open Google for Creating Google App. It will redirect to Google Developer Console.
Creating Google App
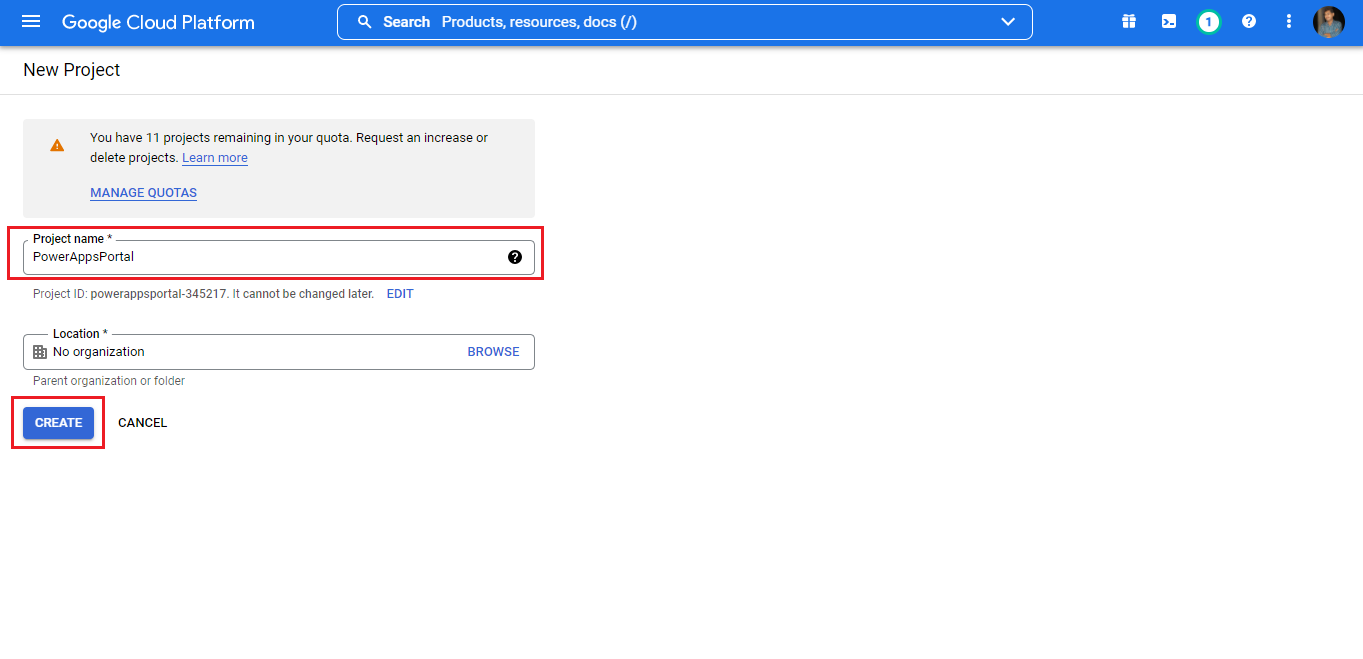
1 Sign in to Google Developer Console, using a Gmail account.
2. Click on create a new API Project or use an existing one and click on Create.
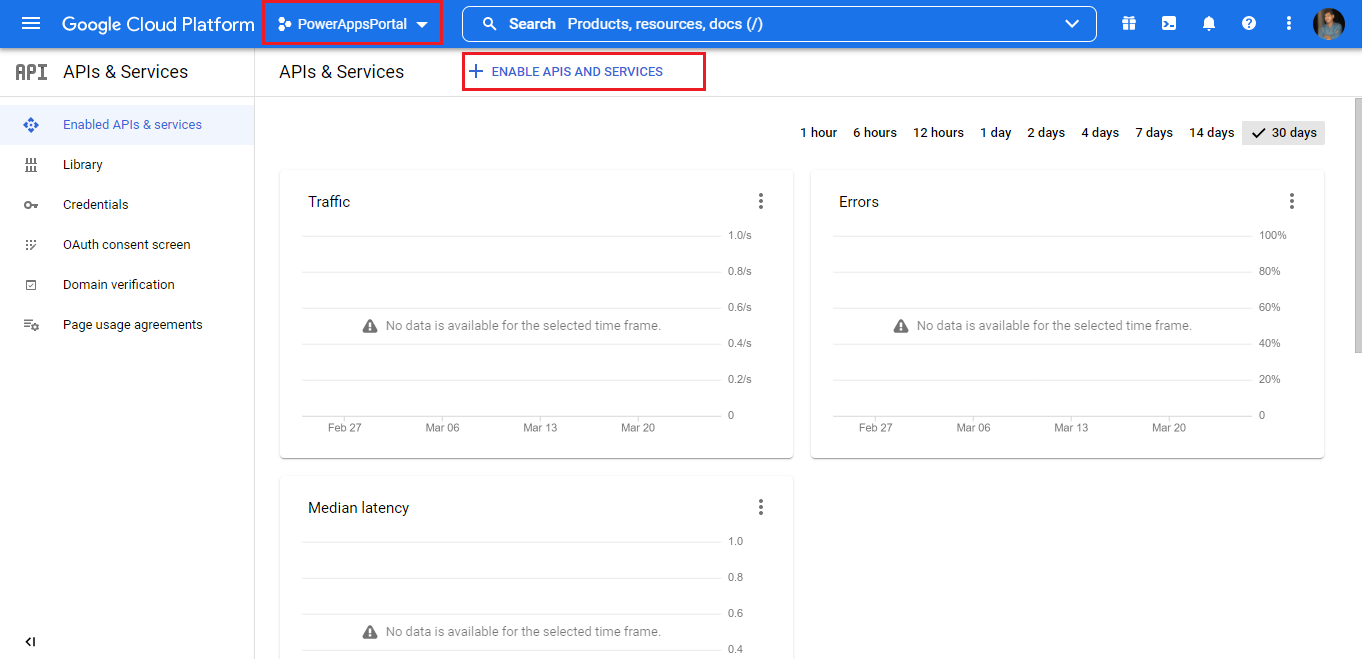
3. Click on Enable APIs and Services.
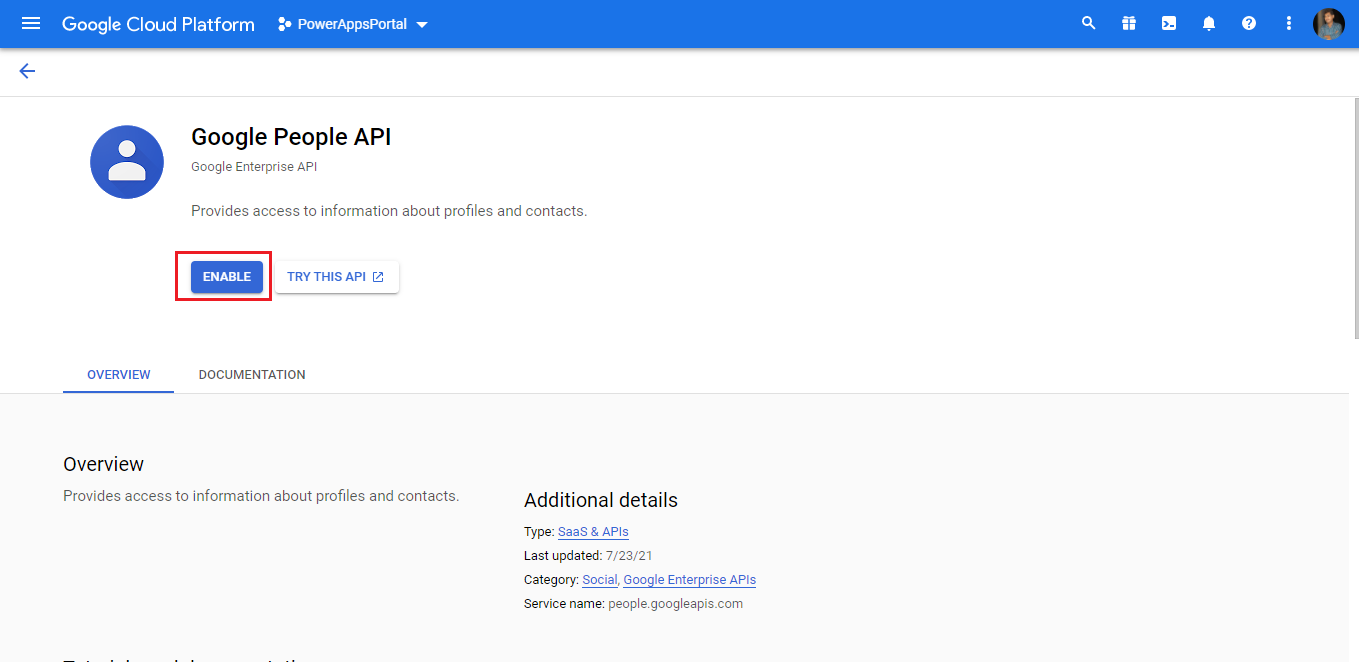
4. Search and select the Google People API.
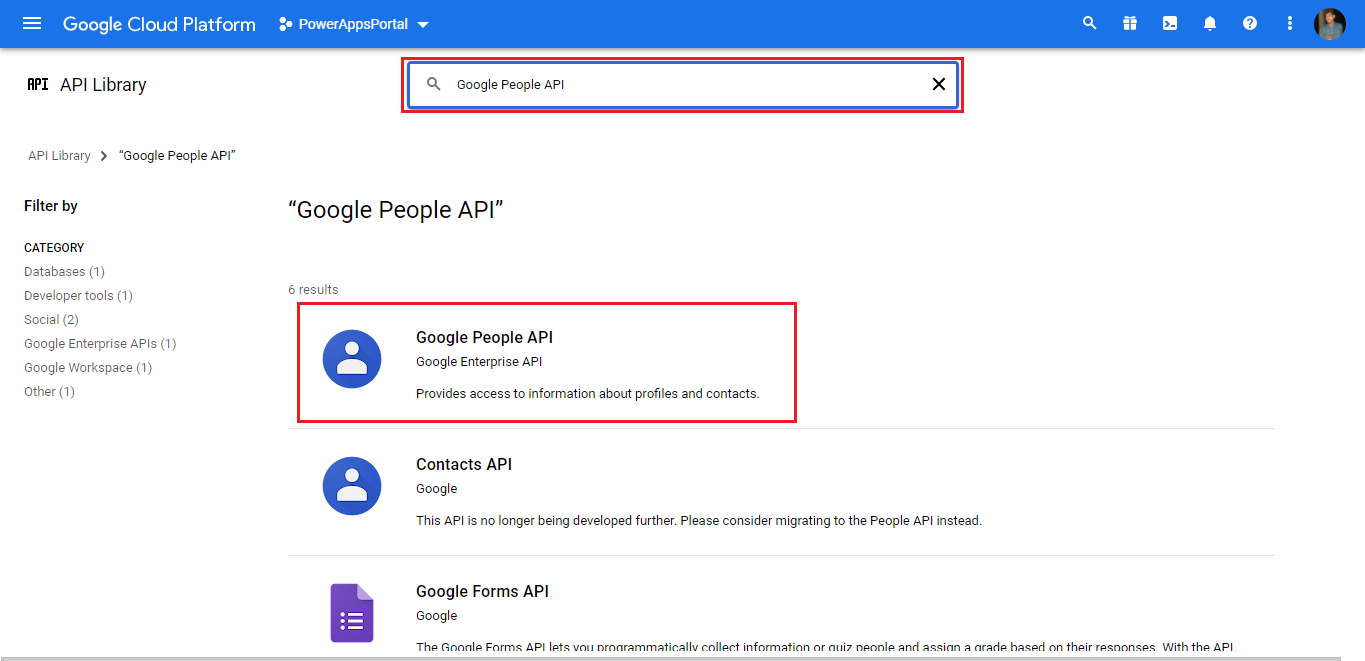
5. Click on Enable.
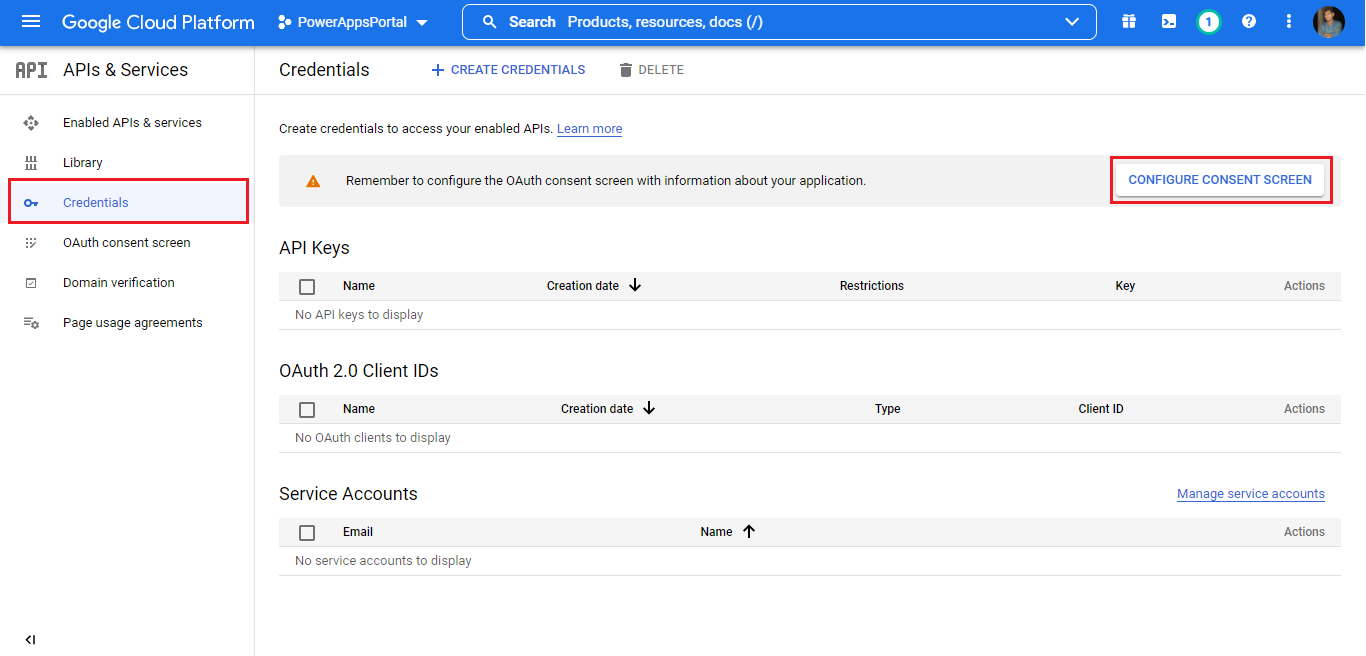
6. Got Credentials and Click on CONFIGURE CONSENT SCREEN.
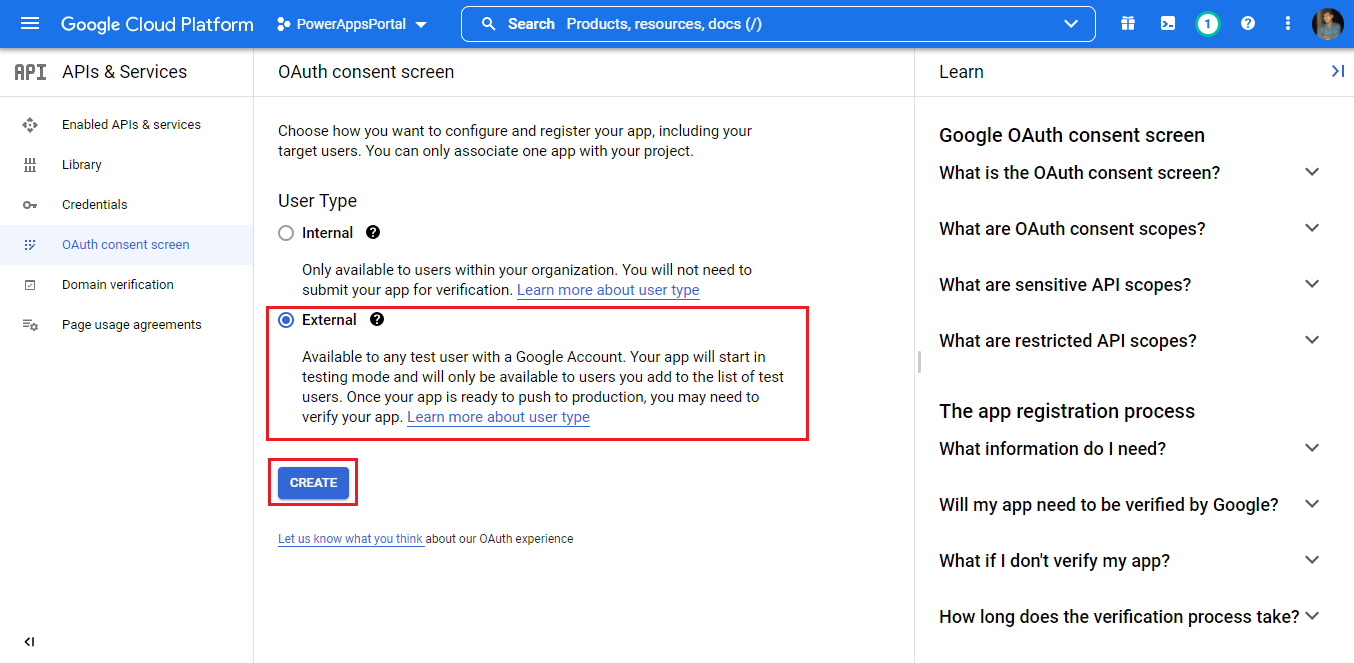
7. Select User Type as External, and Click on Create.
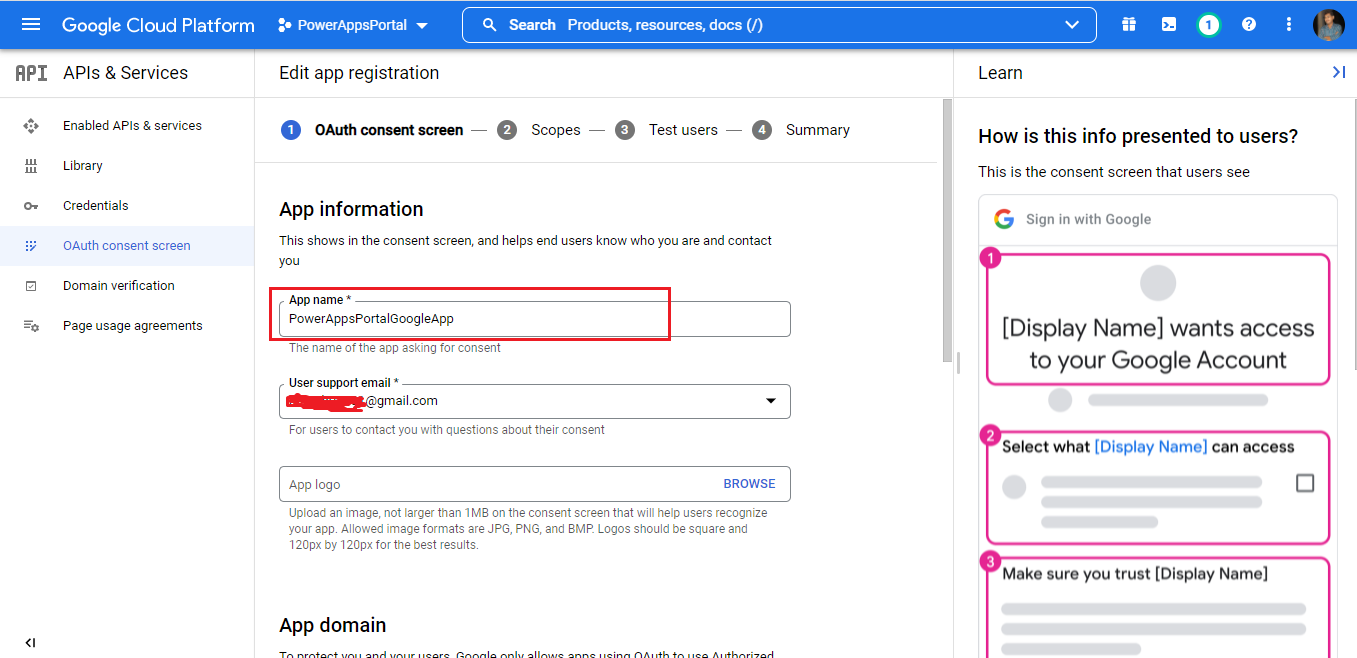
App information
- Give the App Name and Support email (Gmail ID).
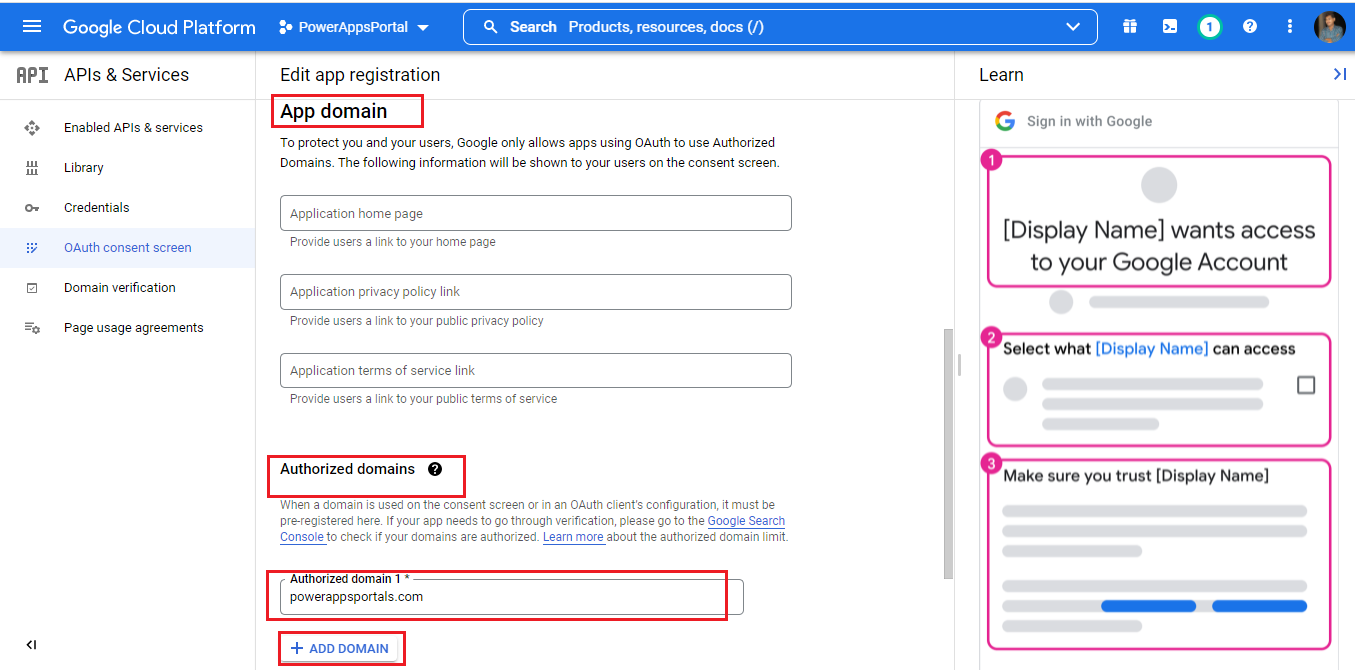
App domain
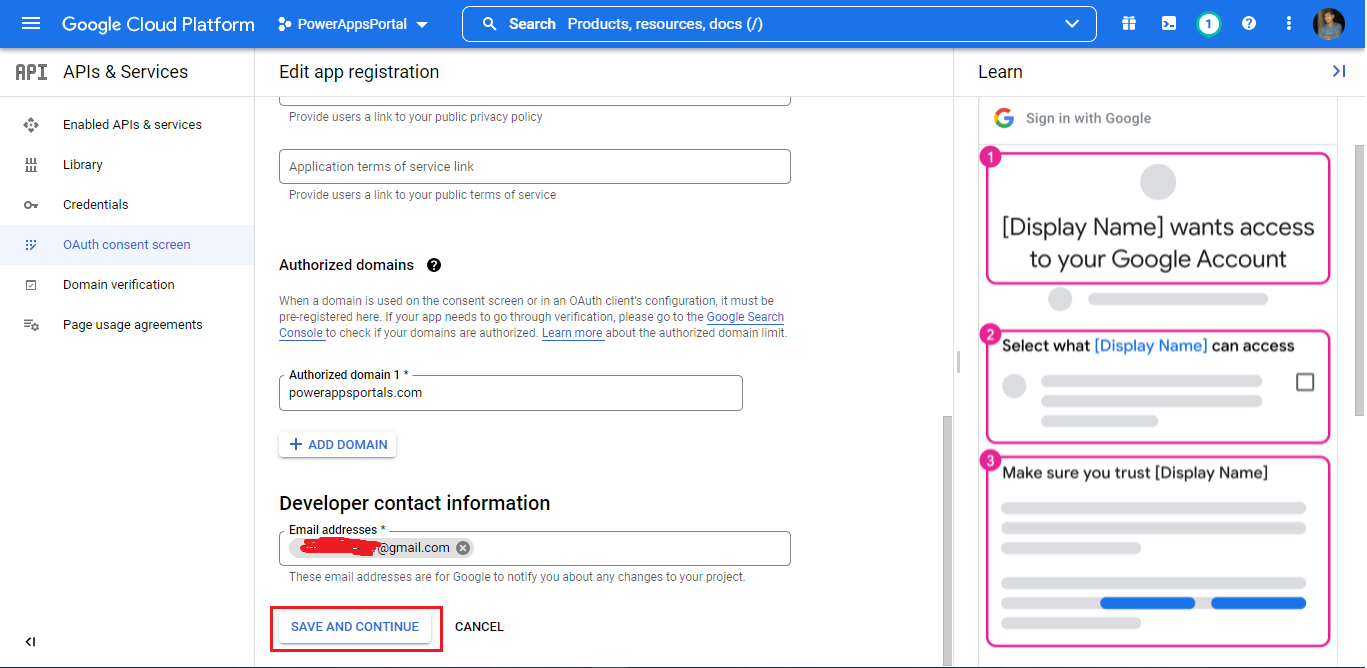
- In Authorized domains Click on +ADD DOMAIN and add powerappsportals.com.
- Click On SAVE AND CONTINUE.
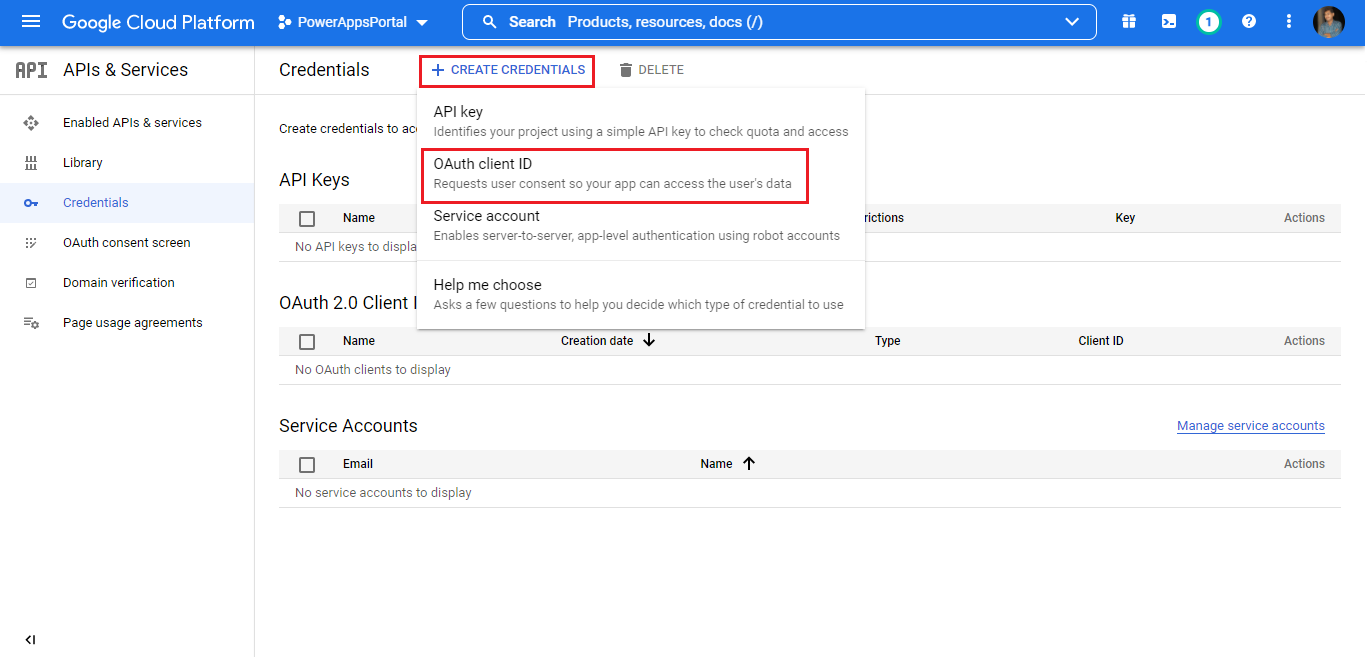
- Click on Credentials on the left pane, click on +CREAT CREDENTIALS, and select OAuth client ID.
- Select Application type Web Application.
- Give the Name for Web Client Name.
- In Authorized Javascript Origins add your Power Apps Portal URL.
- In Authorized Redirect URIs add Power Apps Portal URL followed by /signin-google.
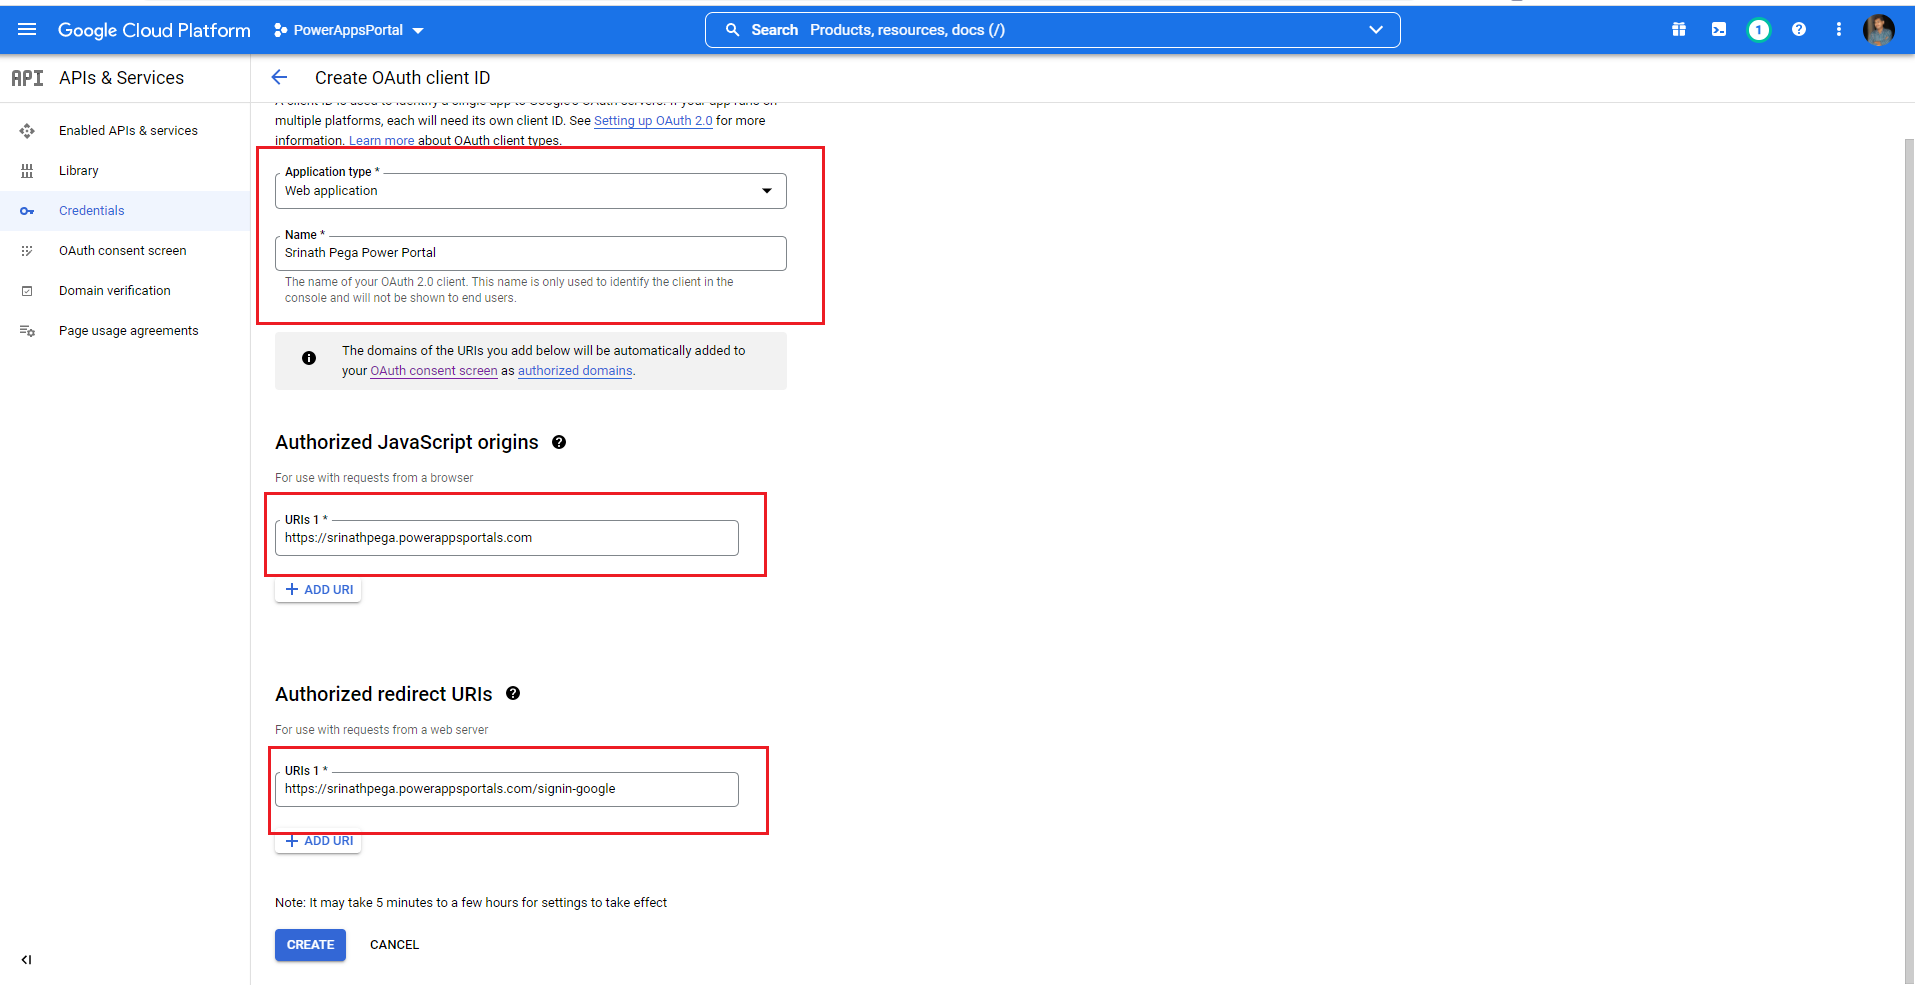
- Click on Create .
- Copy the Client ID and Client Secret.
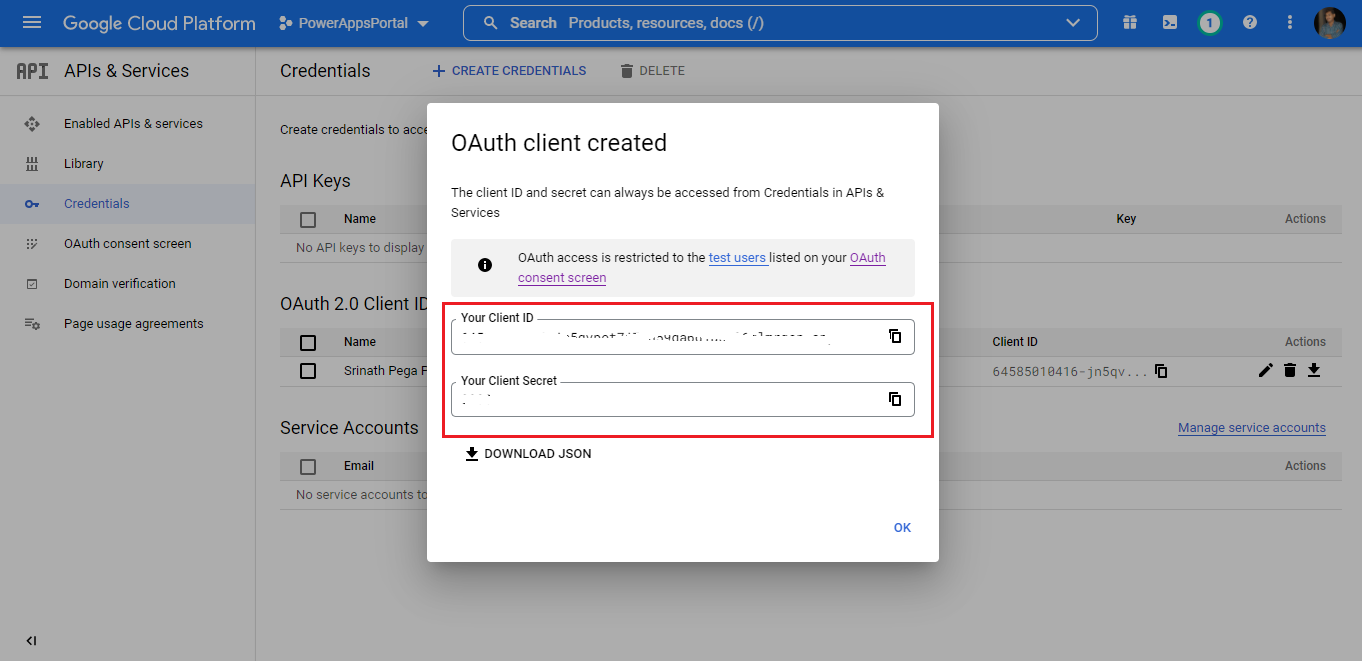
Google App got created successfully, Now go back to the Power Apps Studio.
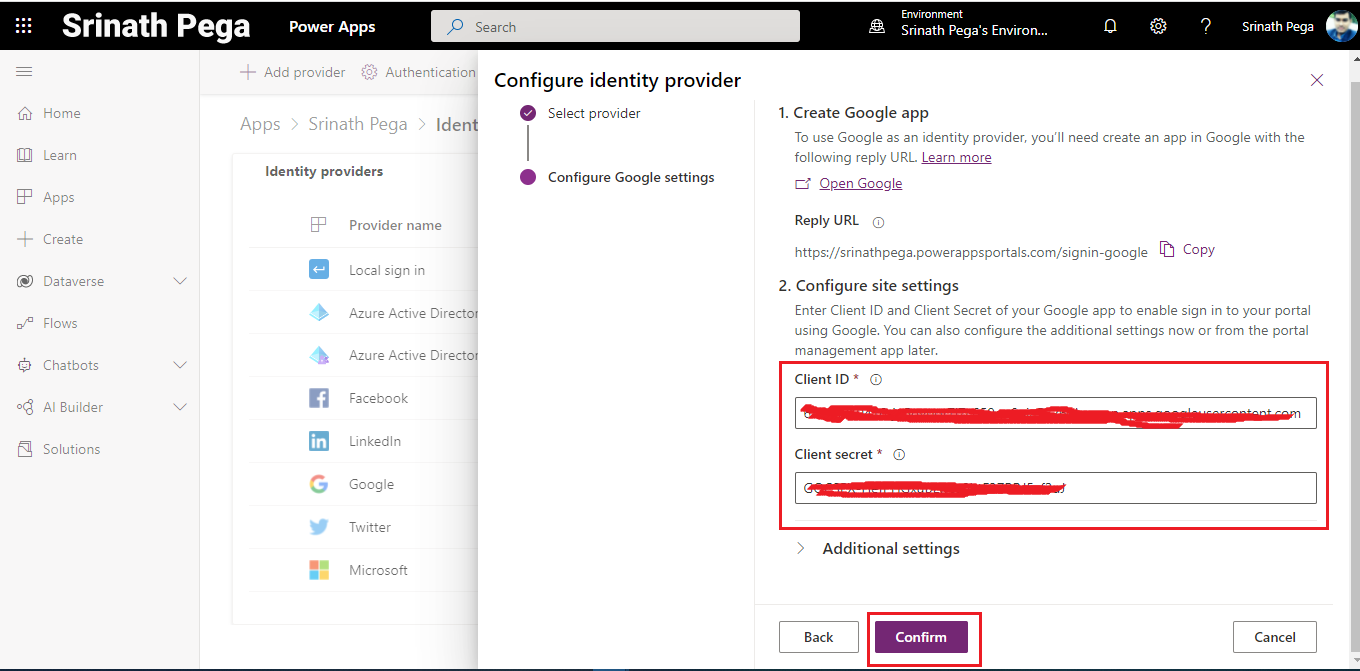
- Past the Client ID and Secret ID.

- Click on Confirm.
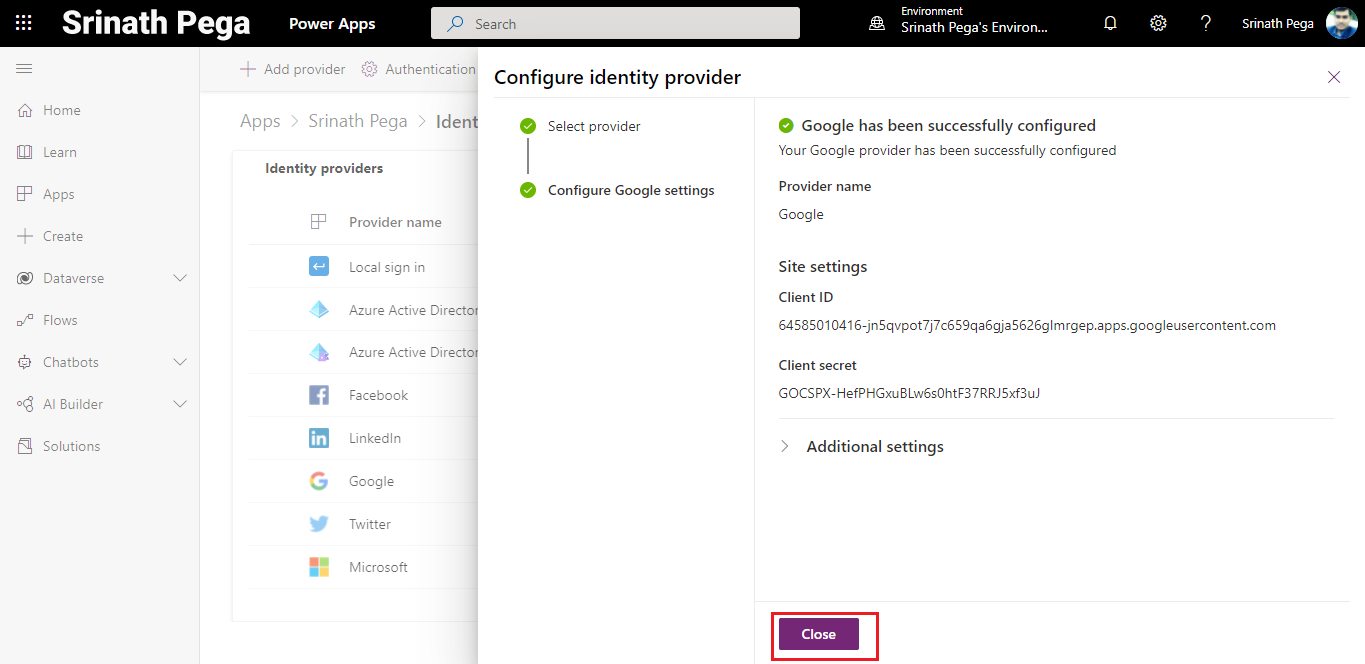
- Click on Close.
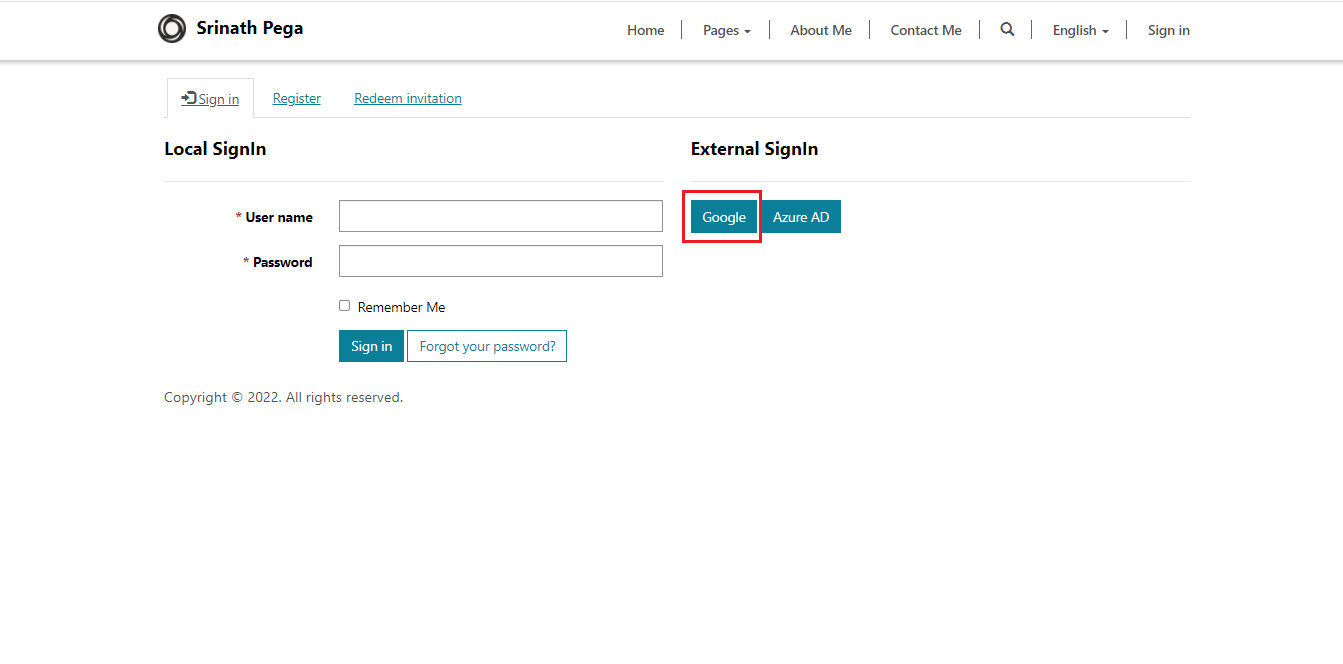
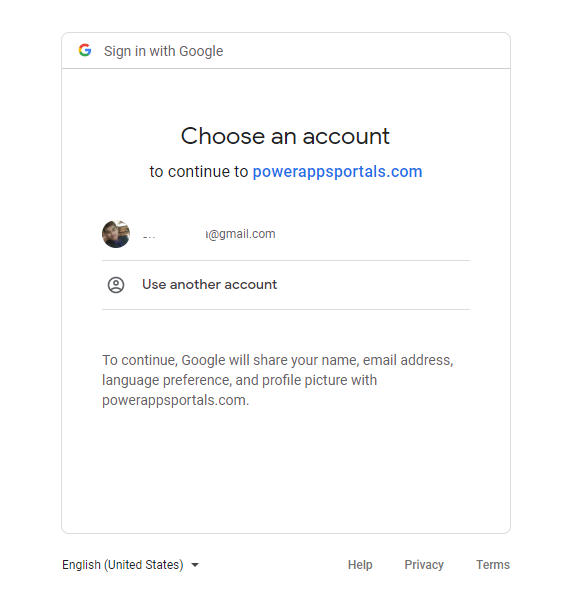
Now sign-in page of the Power Apps Portal, we can sign-in into Power Apps Portal with the Google sign-in option
Select the Google Sign-in with your Google Account.
- Select the Google Account.
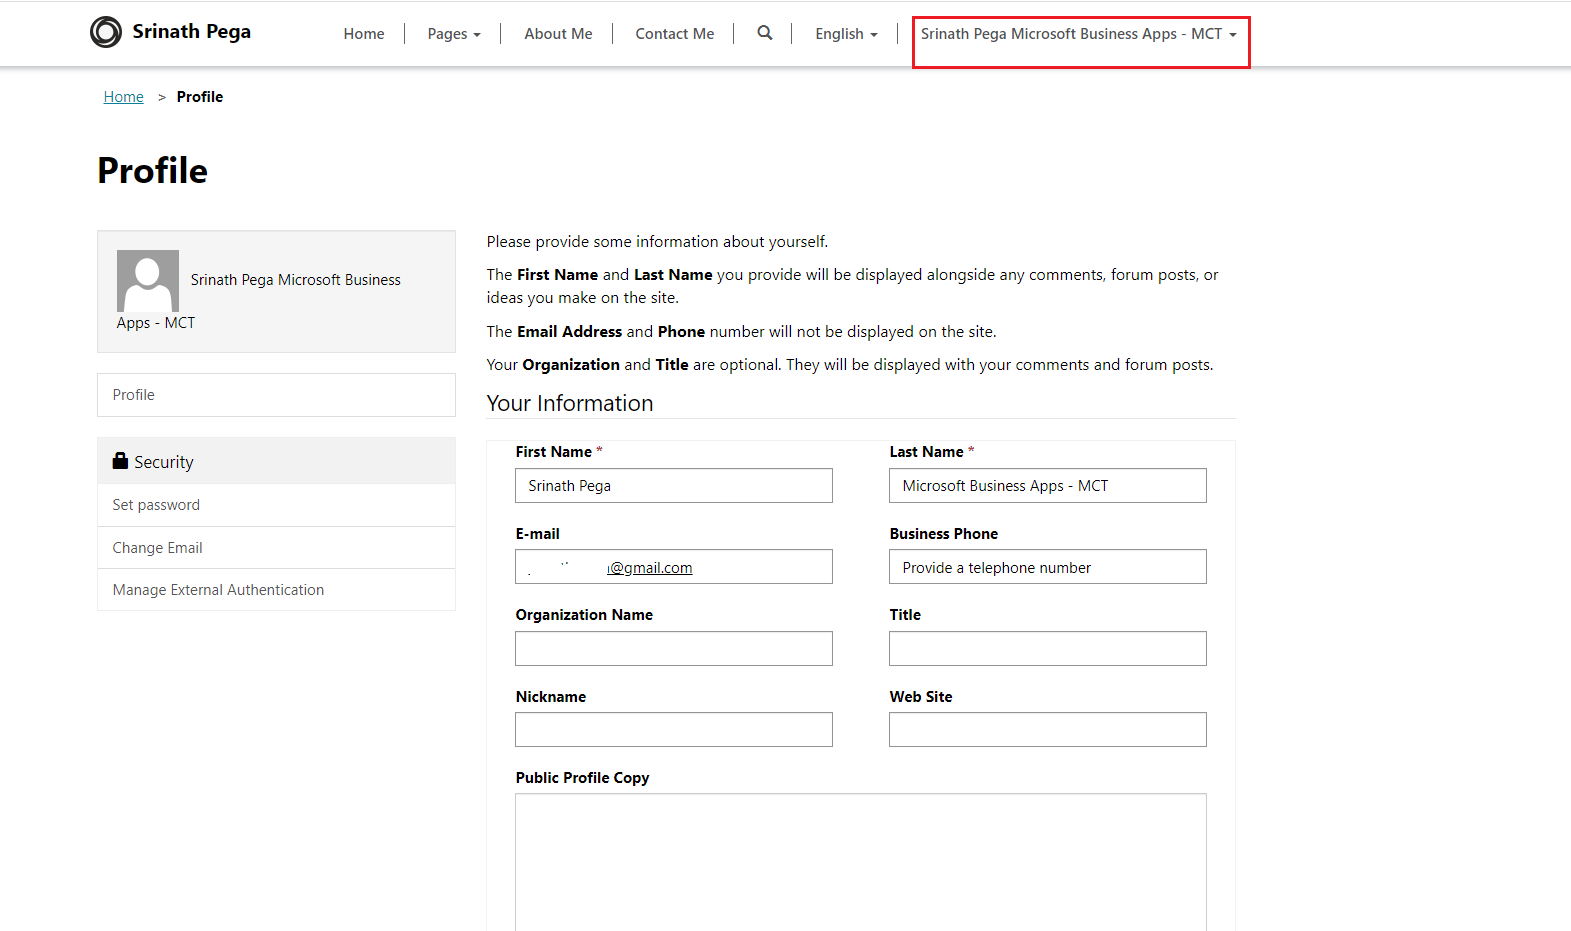
You will be logged in to the Power Apps Portal with your Gmail Account Credentials.
Hope you learn something, Thanks for Reading 📖!
Happy Power365ing!
