
Authentication can be enabled in Power Virtual Agents to allow the user to log in for personalized experiences. Power Virtual Agents utilizes OAuth2 Authentication to provide a robust and secure authentication experience directly through the Power Virtual Agent conversation
Power Virtual Agent and have seen a high impact in reducing the number of cases
with generic questions your Customer Support Team is receiving. As a direct result, the business cost around customer support has been directly reduced.
Step by Step Configuration Of Authentication
Authentication in the Power Virtual Agent uses the OAuth2 authentication through the Azure App Registration service.
- Go to https://portal.azure.com, and go to All services.
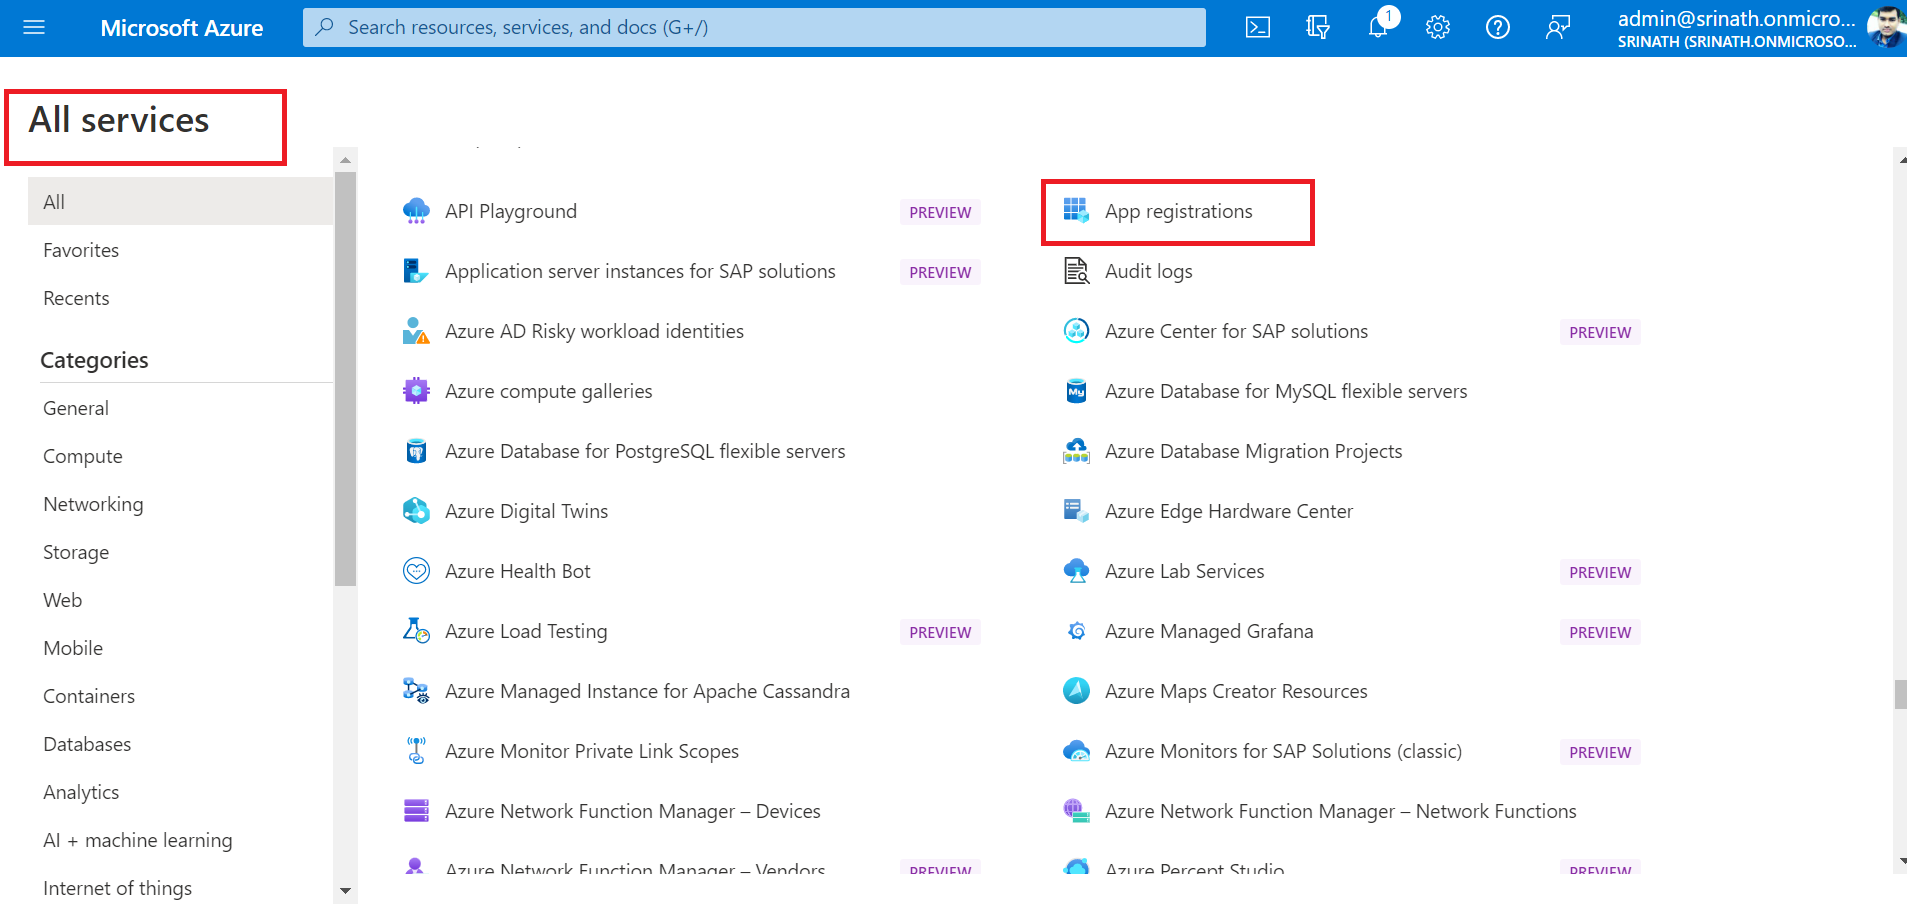
2. Click on App registration.
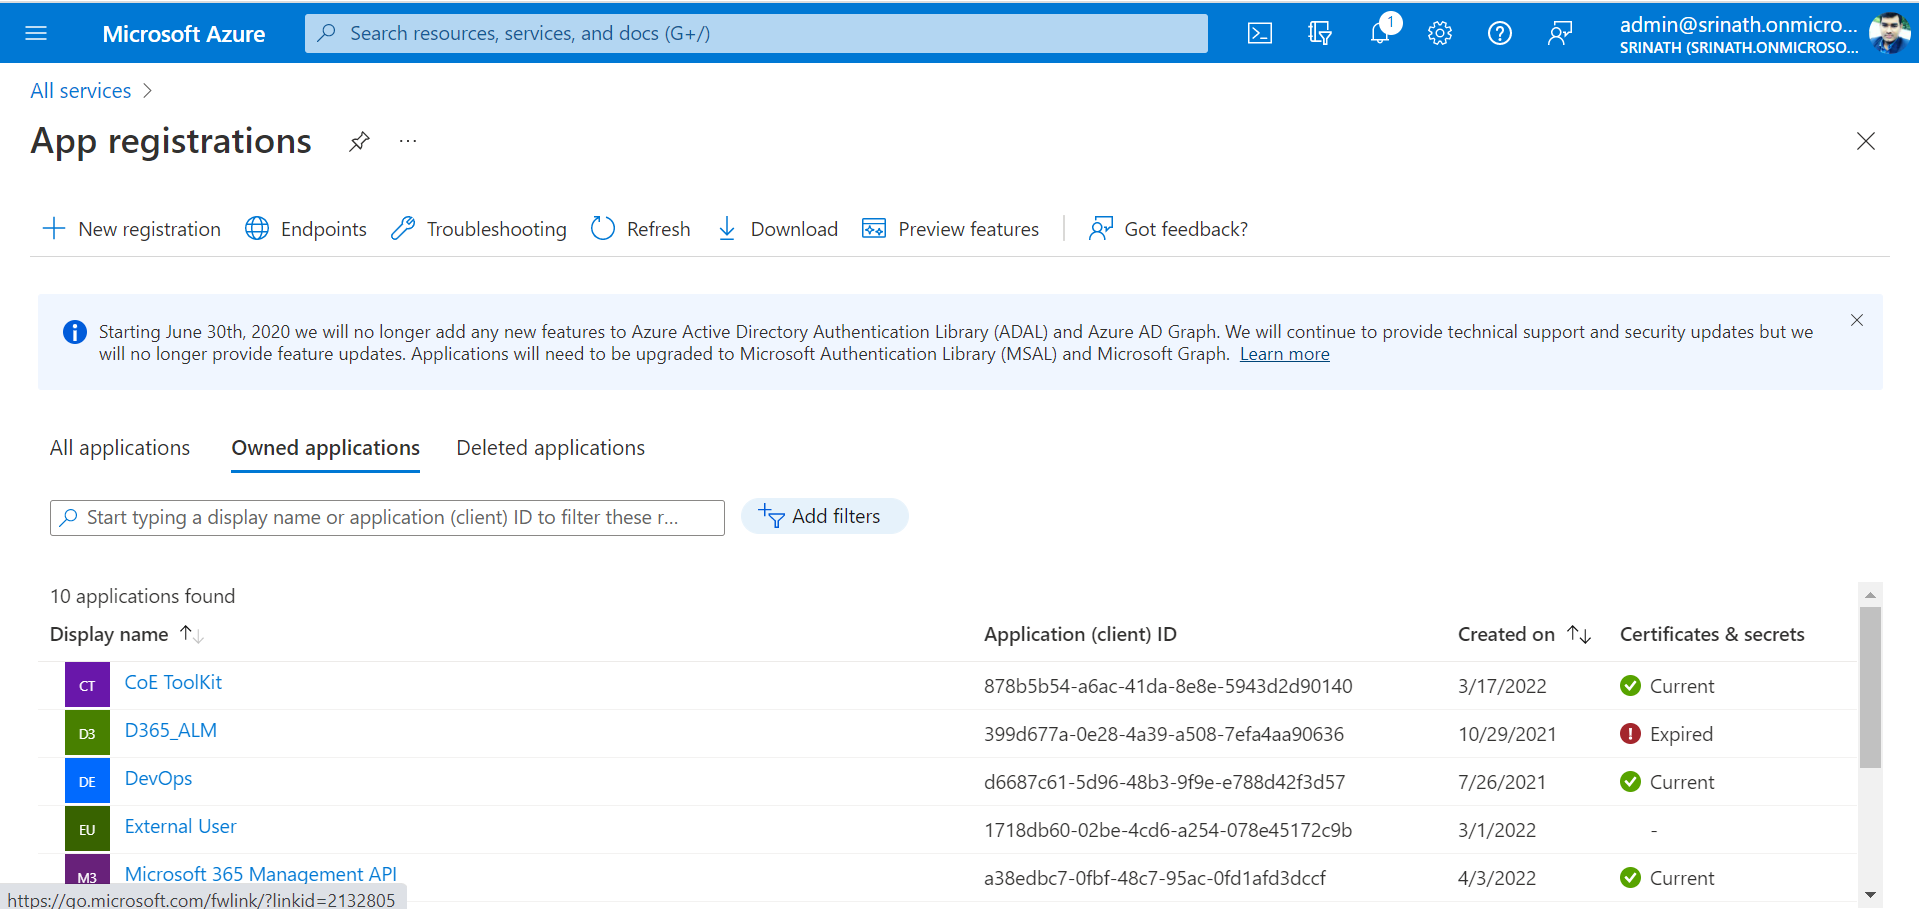
3. Click on New registration.

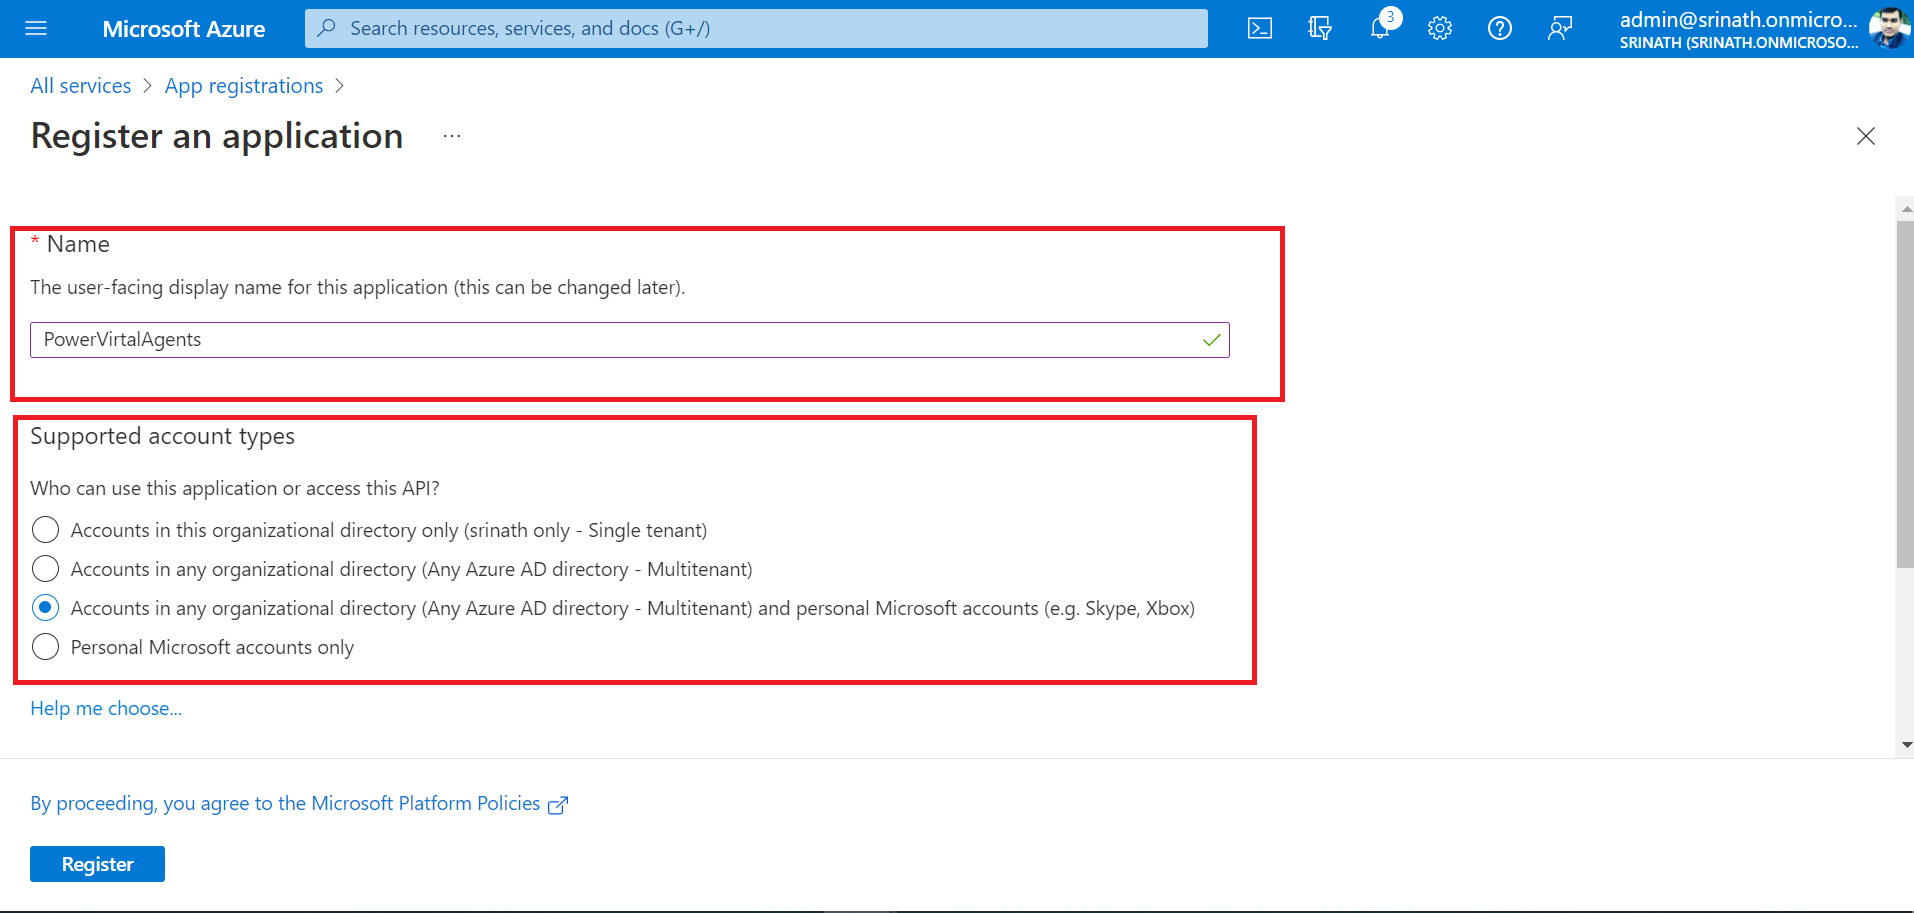
4. Give the Name for the App Registration and select on Accounts in any organizational directory (Any Azure AD directory – Multitenant) and personal Microsoft accounts (e.g. Skype, Xbox).
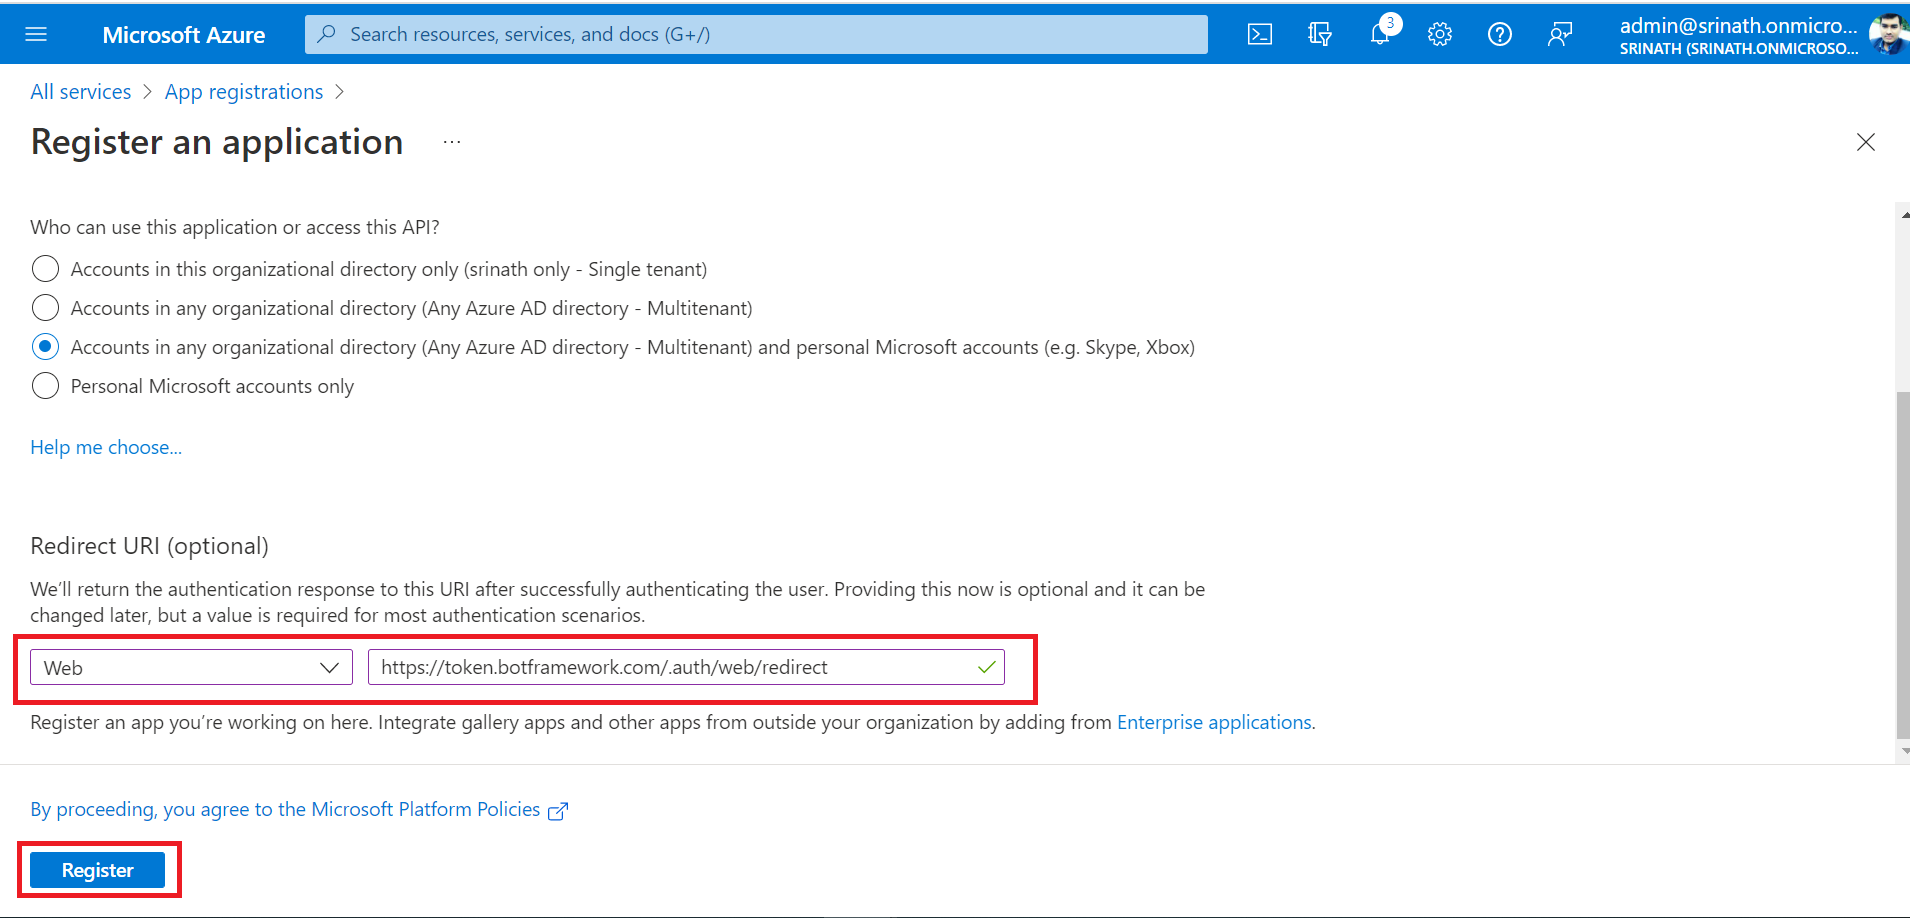
5. Give the Redirect URI. (https://token.botframework.com/.auth/web/redirect) and Click on Register.
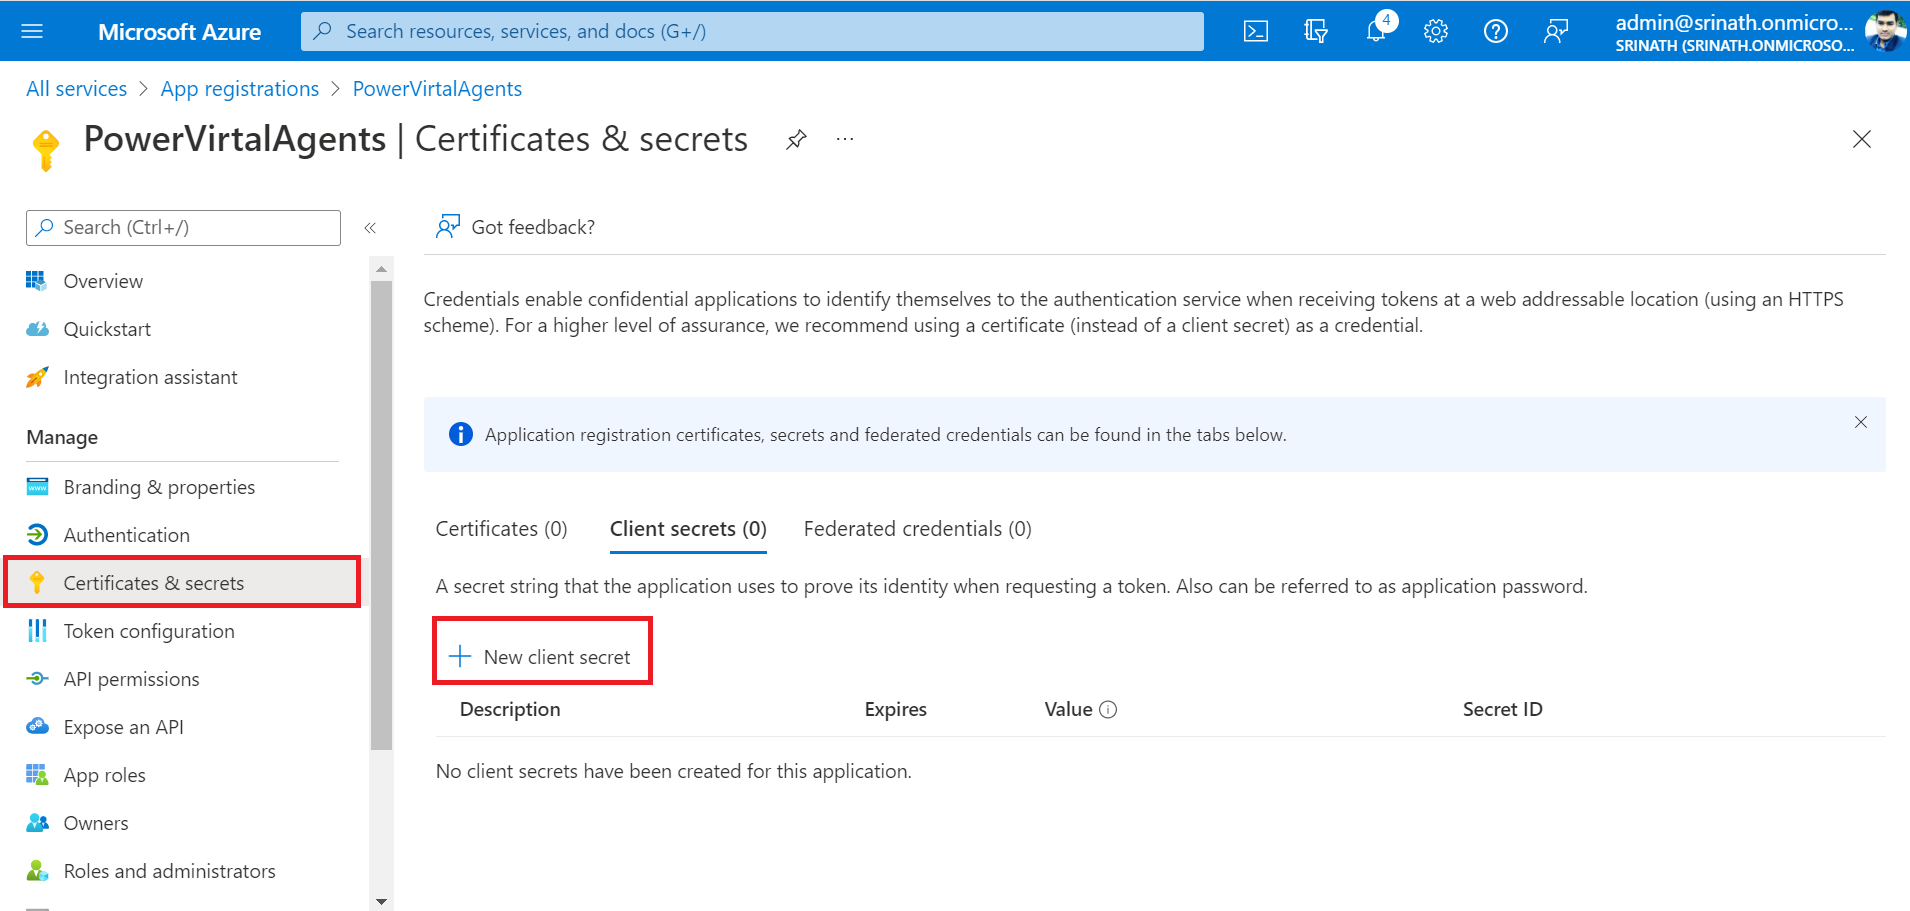
6. Click on Certificates & secrets in the left navigation panel and click New client secret.
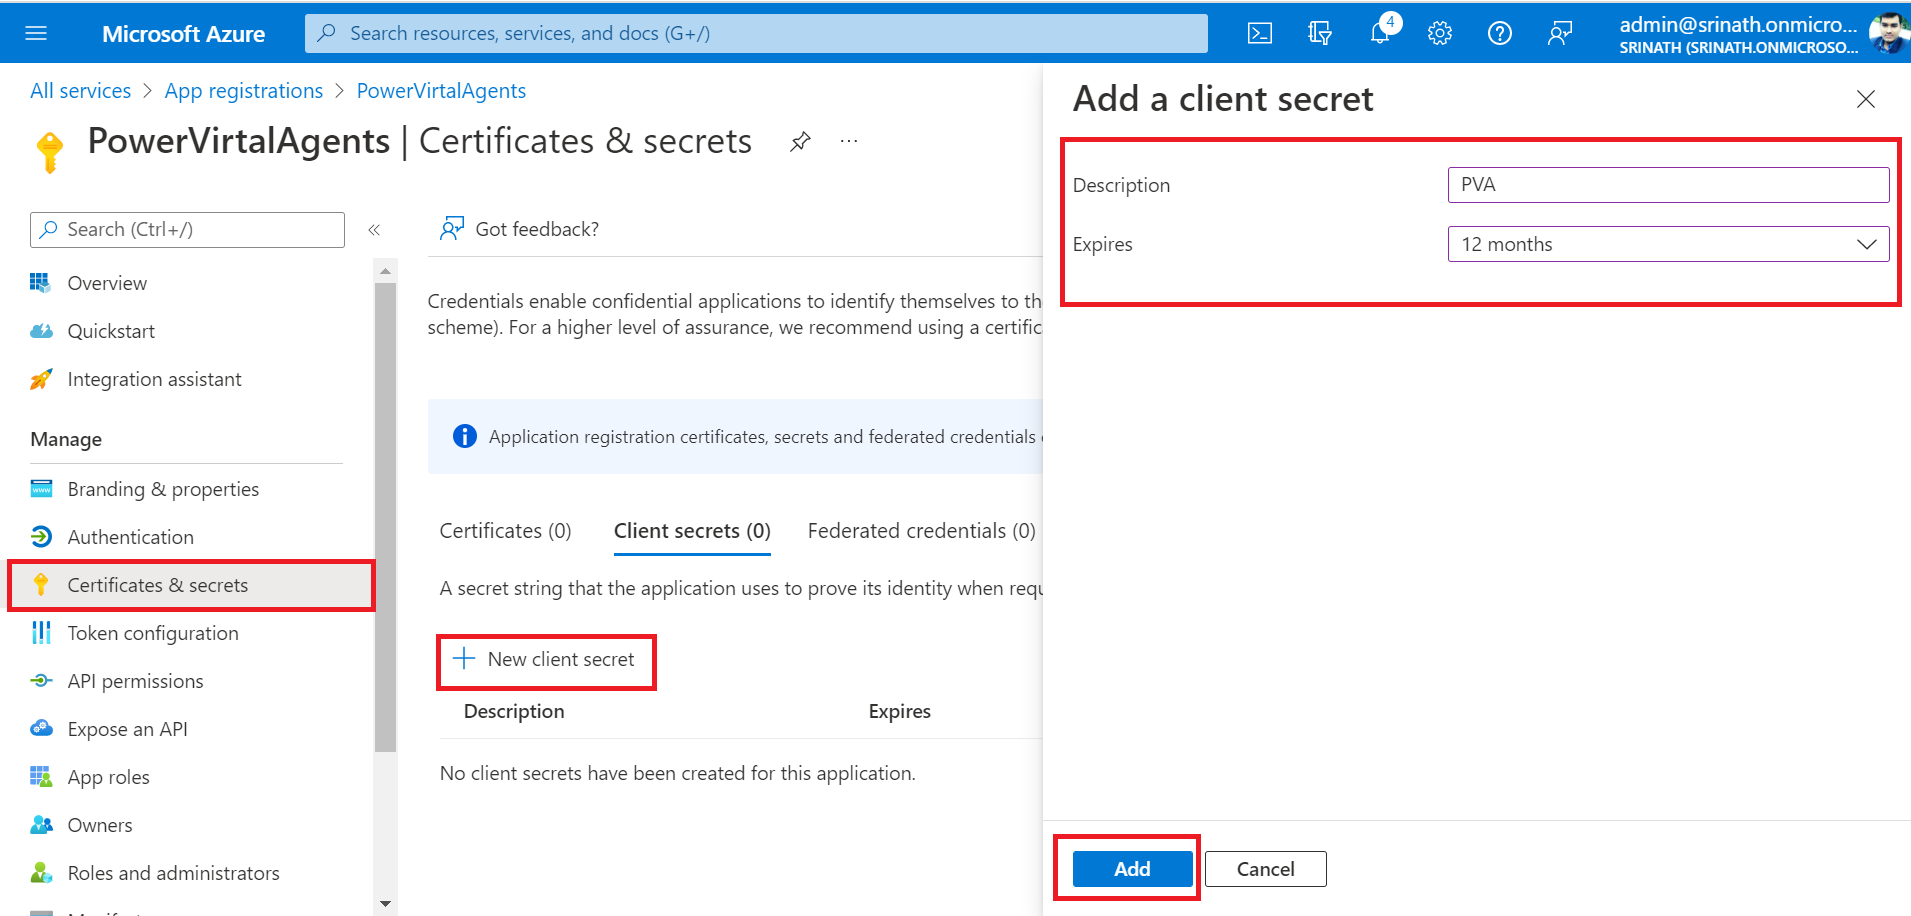
7. Give the Description and Expires to the secret key and Click on Add.
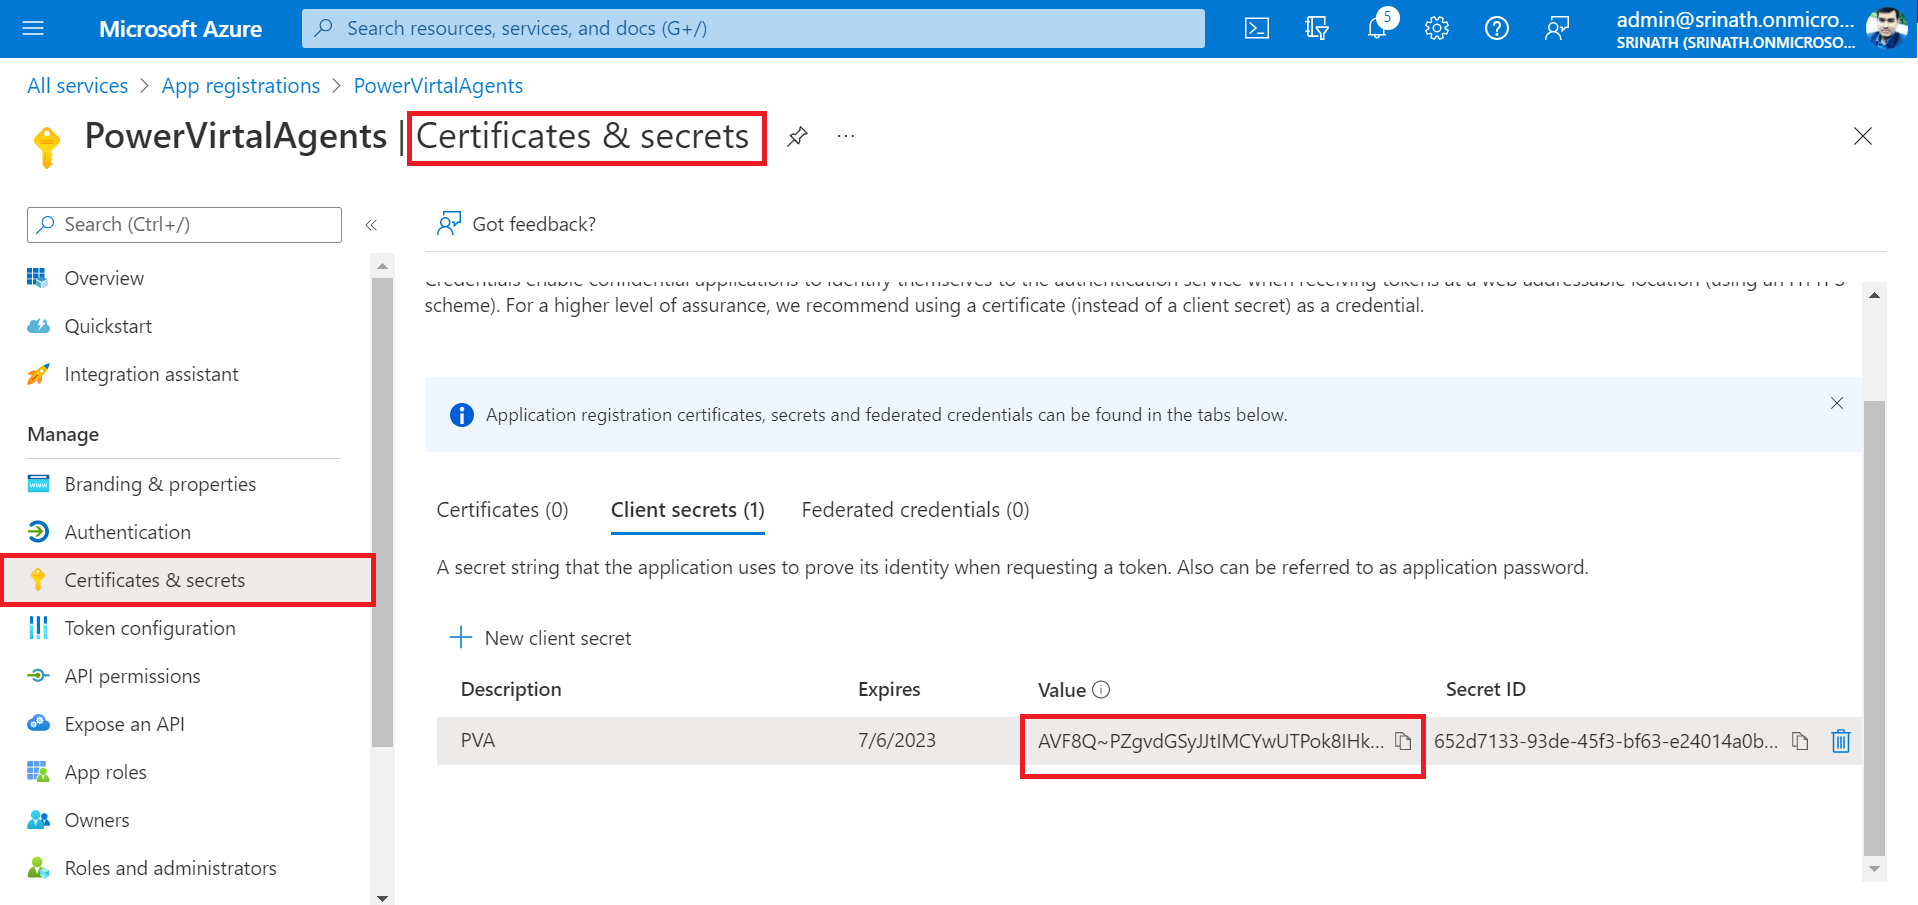
8. Copy the client secret (value) generated for later reference.
Hope you learn something, Thanks for Reading 📖!
Happy Power365ing!
