
Introduction
Authentication can be enabled in Power Virtual Agents to allow the user to log in for personalized experiences. Power Virtual Agents utilizes OAuth2 Authentication to provide a robust and secure authentication experience directly through the Power Virtual Agent conversation.
Power Virtual Agent and have seen a high impact in reducing the number of cases
with generic questions your Customer Support Team is receiving. As a direct result, the business cost around customer support has been directly reduced.
The user has logged in to Power Virtual Agents , Power Automate to pass that
authentication token to other systems, to allow the bot to act on behalf of the logged in user to retrieve data or take action. Flow that passes the authentication token from the bot to the Microsoft Graph, to retrieve and return further user details.
In the previous blog we seen the how to add the flow action to the Power Virtual agent. https://srinathpega.com/2022/07/12/power-virtual-agents-13-authentication-with-power-automate-part-1/
Create a flow to pass the authentication token
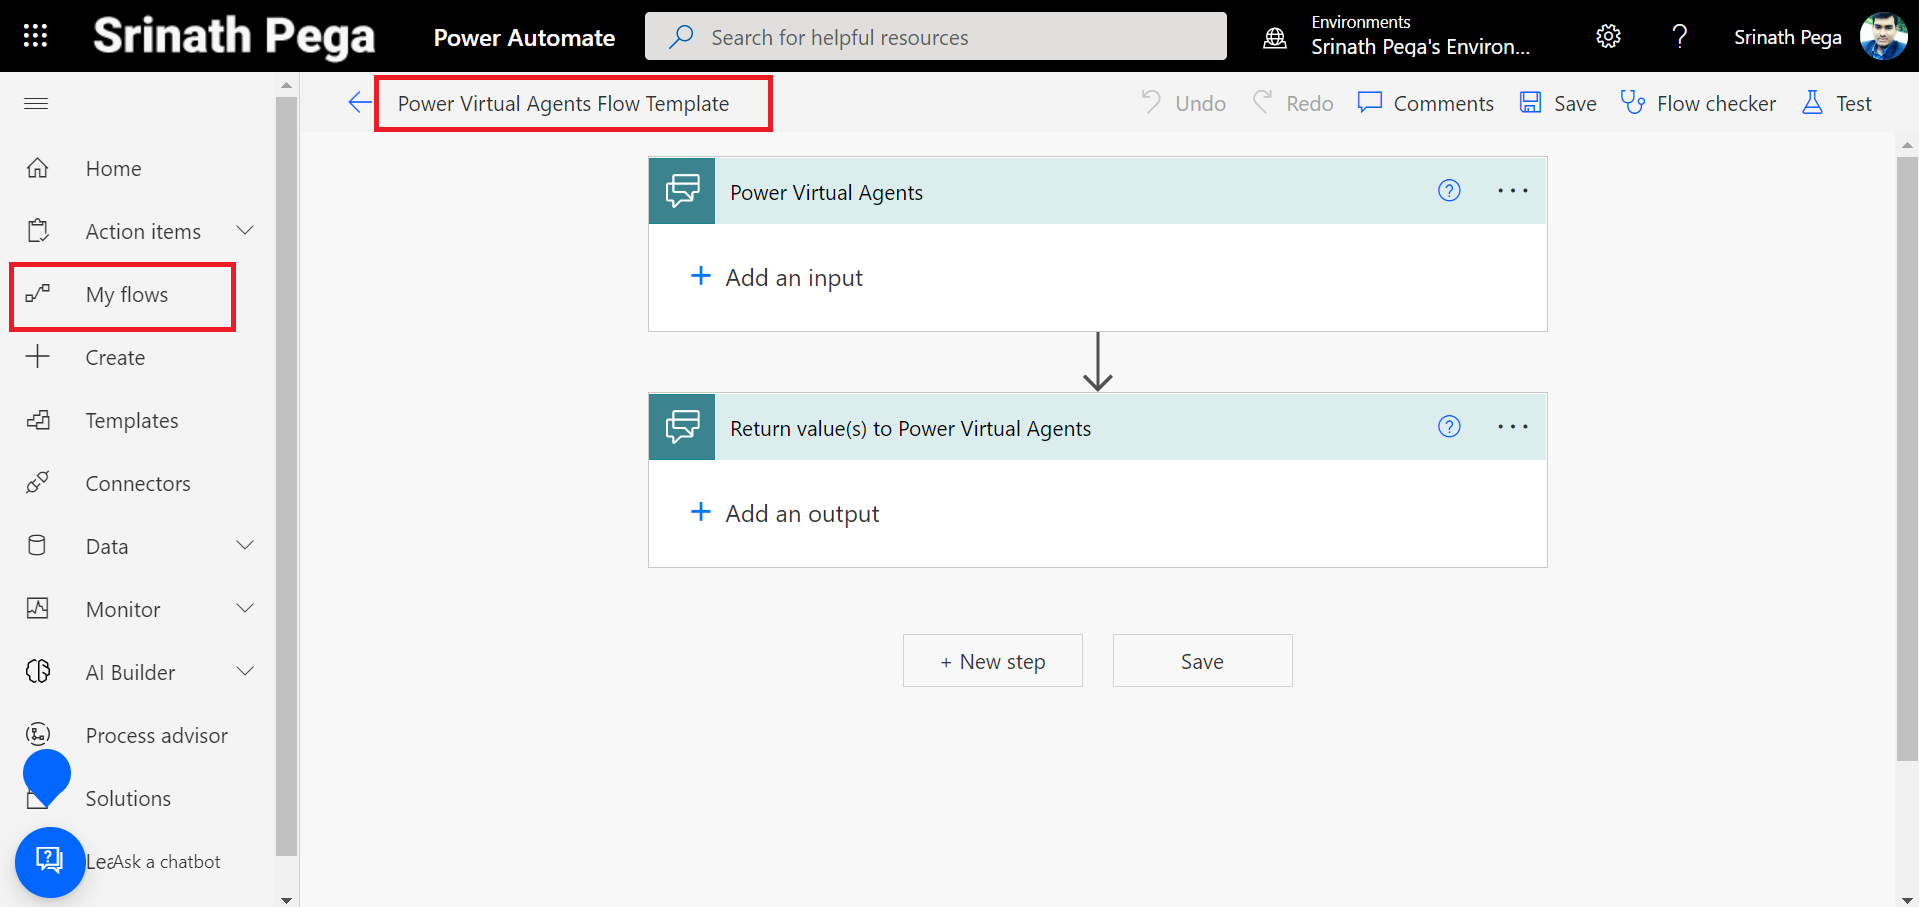
- Go To Power Automate Portal.
- Go To My Flows and Open Power Virtual Agents Flow Template
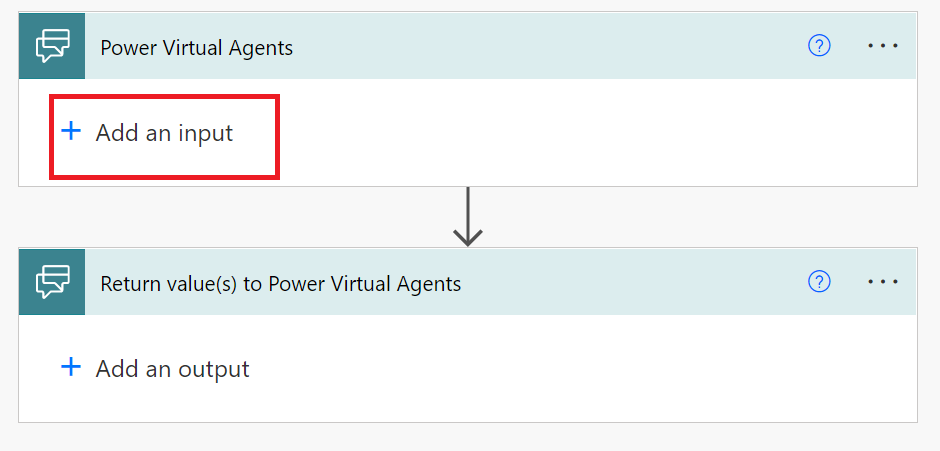
3. Click on Add an Input in the first stage of the flow.
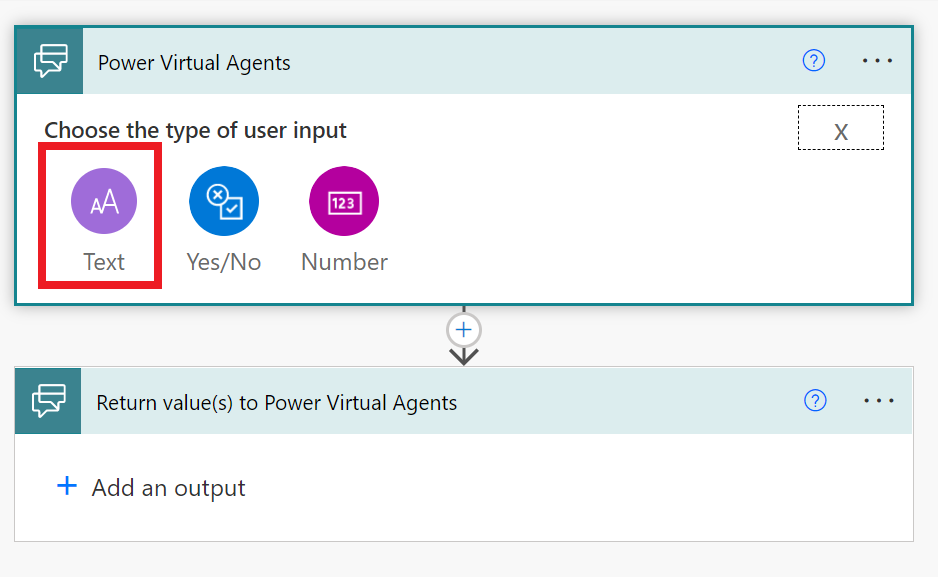
4. Select Text.
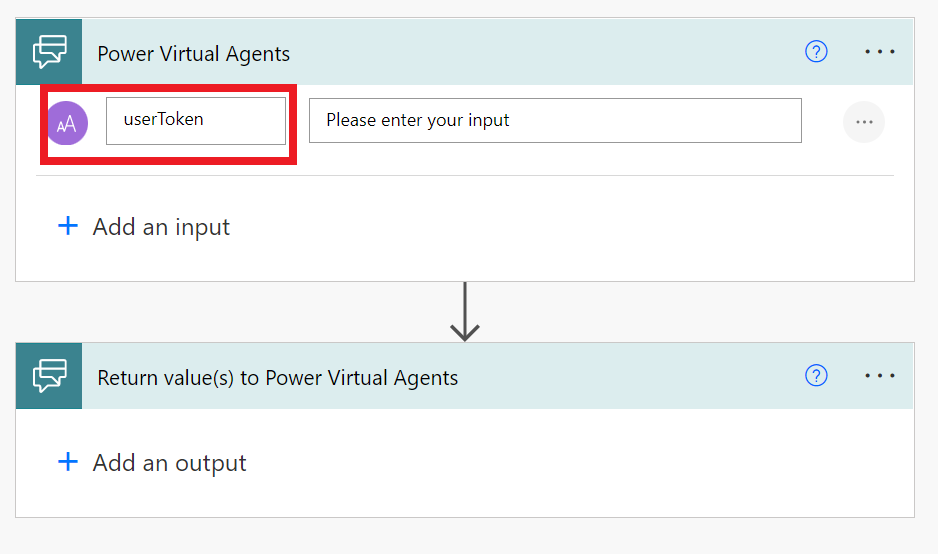
5. Name your input userToken.
6. Add new Action in between these actions.
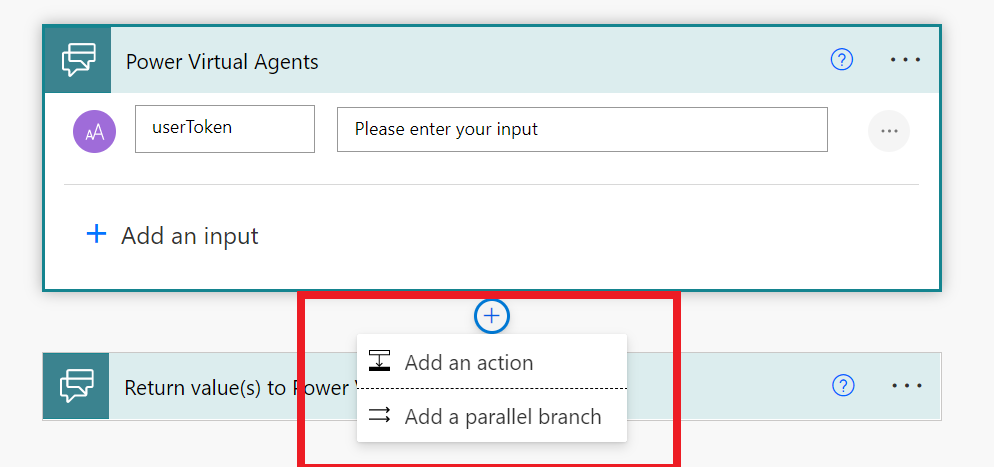
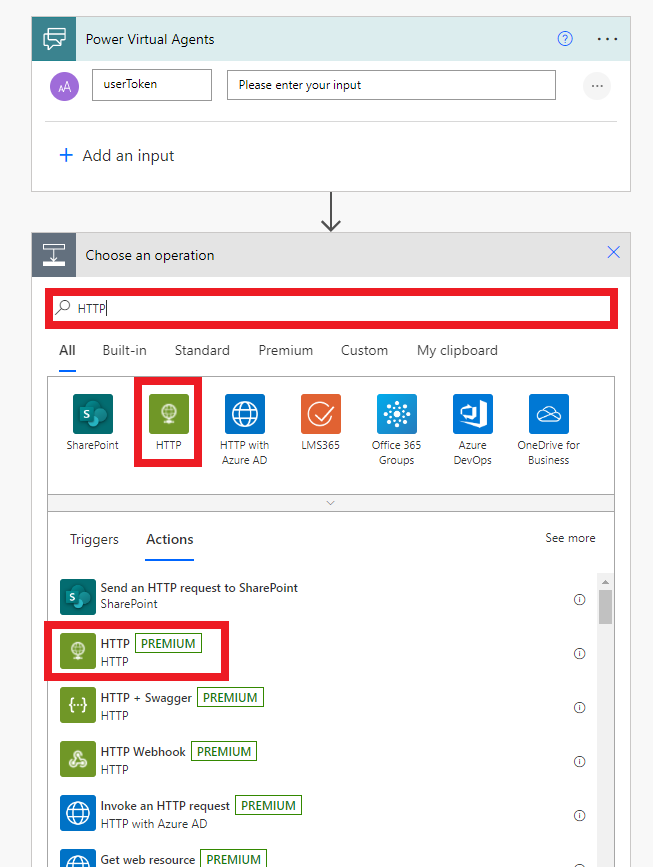
7. Select the Add an action and Search for HTTP and Select the HTTP connector.
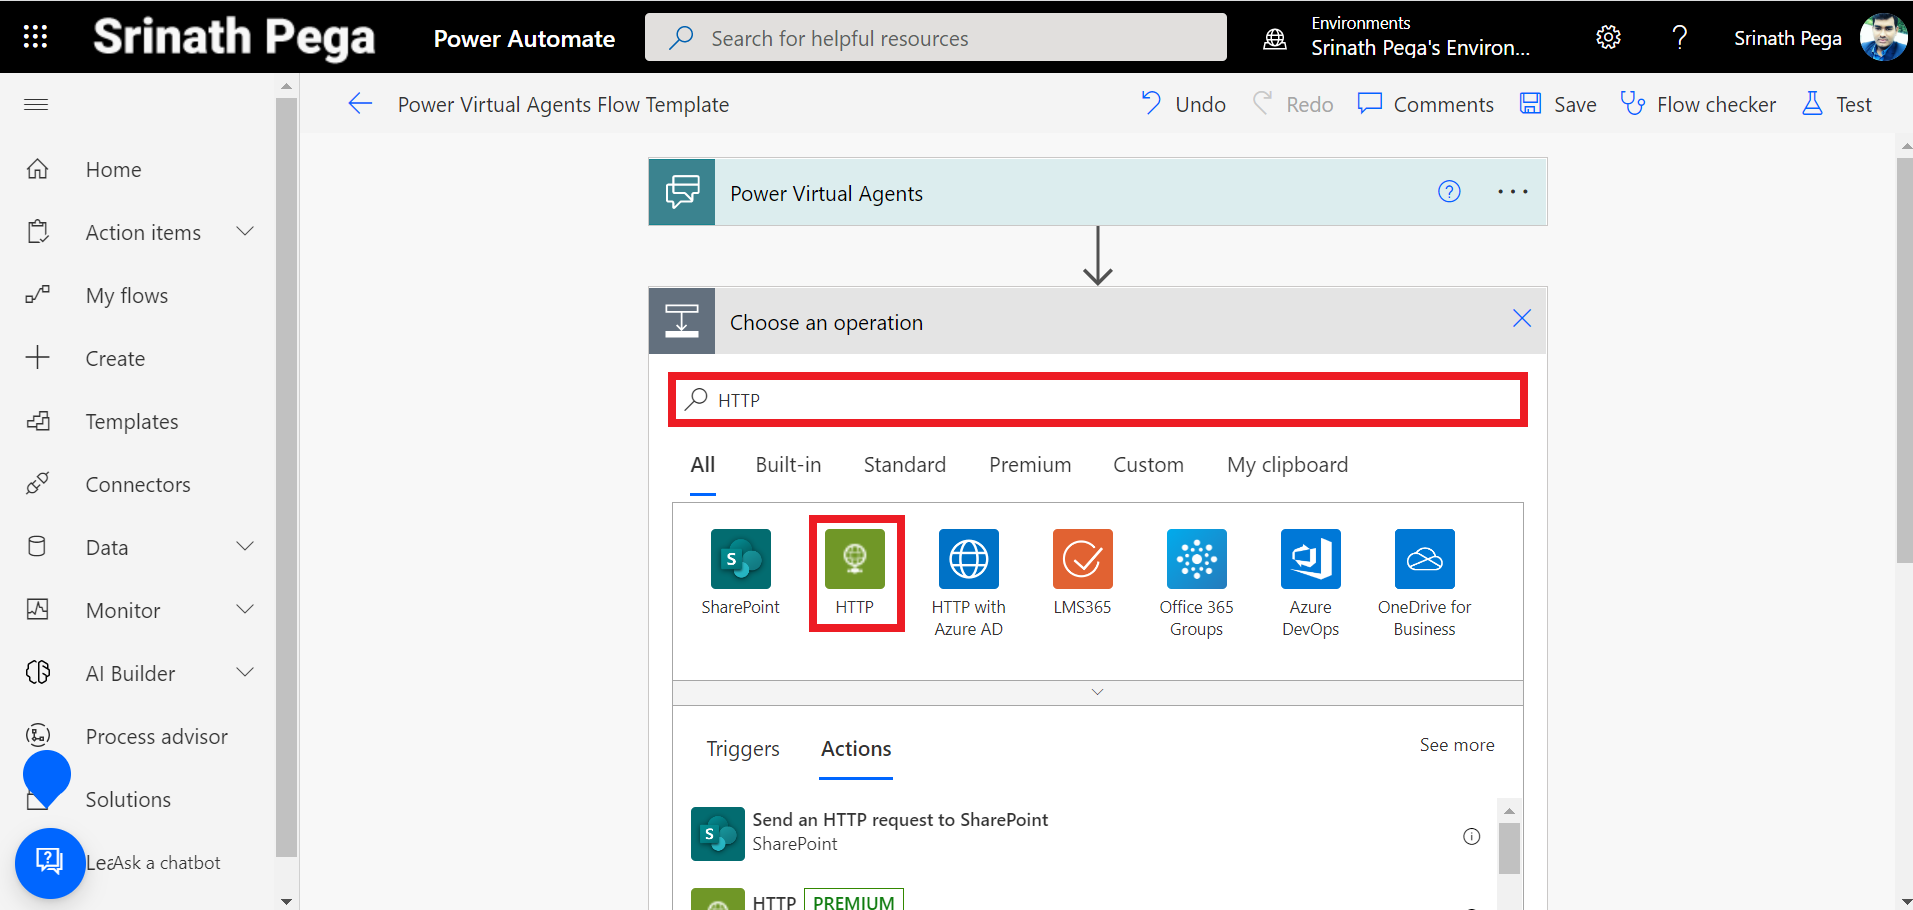
NOTE: We are going to use the HTTP connector to pass the
authentication token from the logged in user to the Microsoft Graph API.
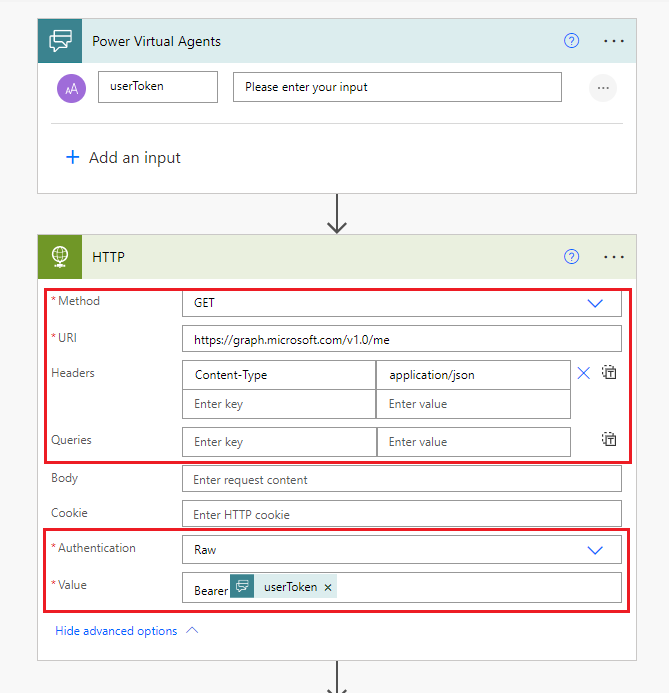
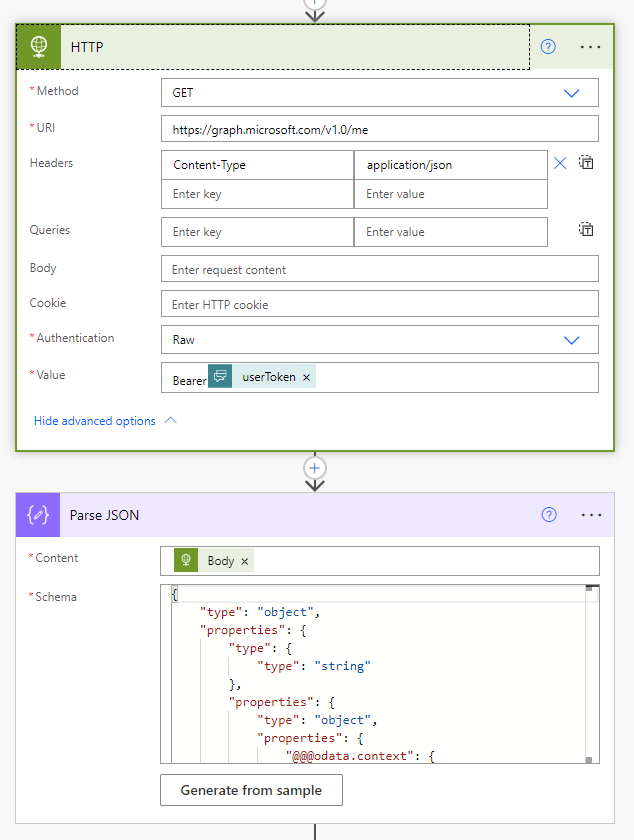
8. Fill the Connector Details
Method: GET (select from dropdown)
URI: https://graph.microsoft.com/v1.0/me
Headers (as shown in the screenshot below):
Content-Type
application/jso
Authentication: Raw (select from dropdown)
To enter the Value field, type Bearer then leave a space, then select userToken from the Dynamic content. (This is the authentication token that has been passed through from your chatbot when the user logged in)
9. Now we need to take the data that comes back from the Microsoft Graph API and turn it into a format that can be returned to the chatbot and displayed to the user. For this we will use the parse JSON action.
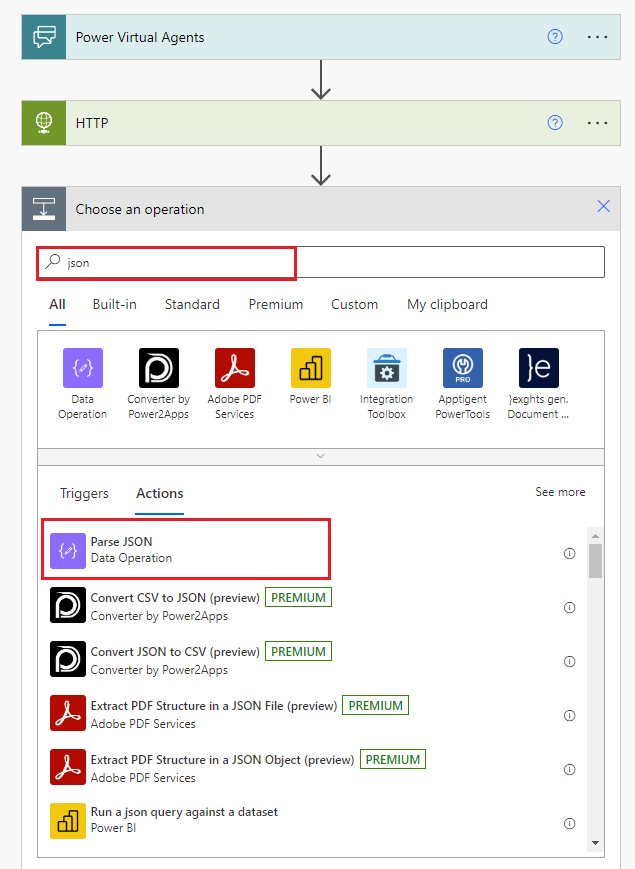
10. Add an action. Search for json and select the Parse JSON action.
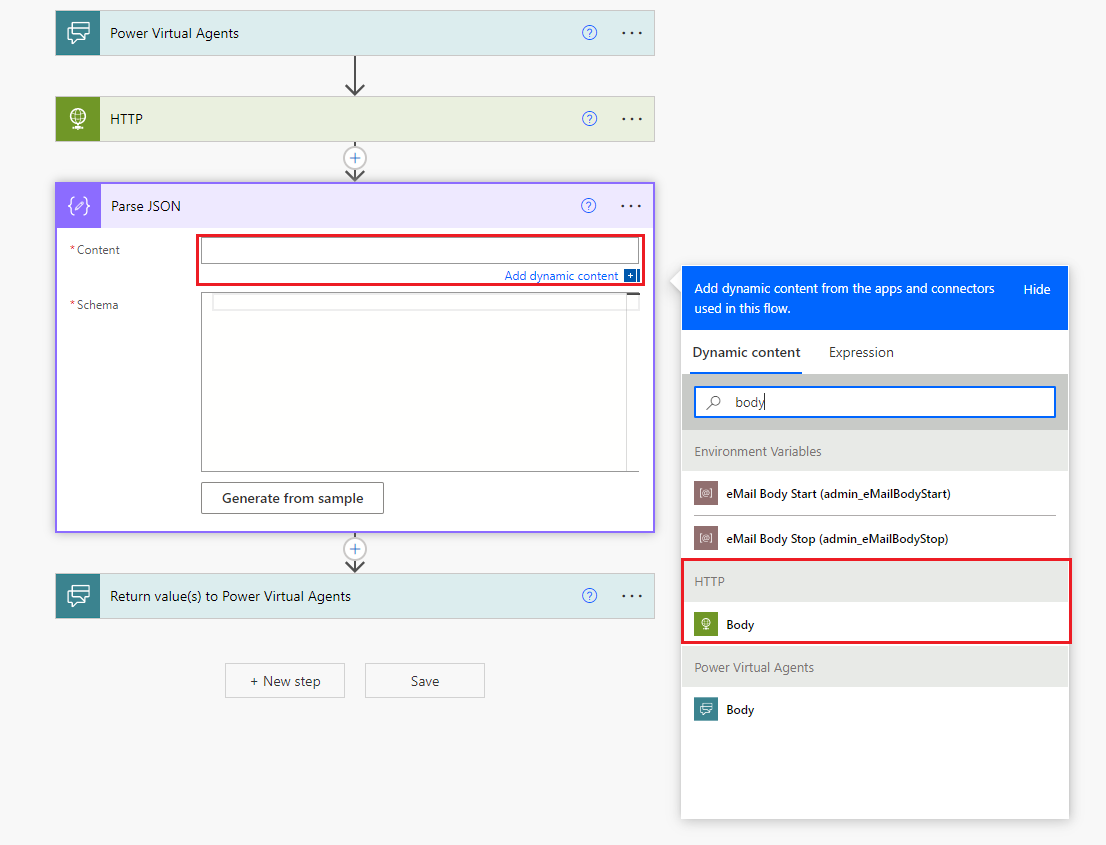
11. Click on the Content field and choose Body from the Dynamic content.
12. Copy past the below JSON Code to schema.
{
“type”: “object”,
“properties”: {
“@@odata.context”: {
“type”: “string”
},
“businessPhones”: {
“type”: “array”,
“items”: {}
},
“displayName”: {},
“givenName”: {},
“jobTitle”: {},
“mail”: {},
“mobilePhone”: {},
“officeLocation”: {},
“preferredLanguage”: {},
“surname”: {},
“userPrincipalName”: {},
“id”: {}
}
}
13. Now Select the
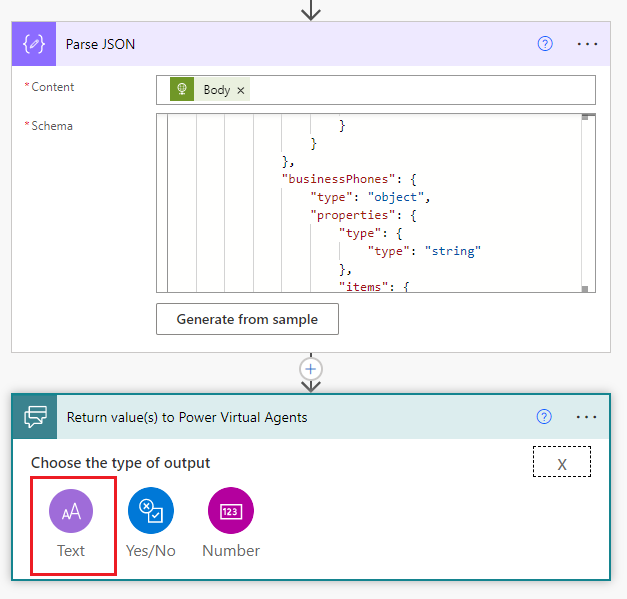
14. Click on the Return value(s) to Power Virtual Agents action to open it up, and click on Add an output.

15. Select the Text.
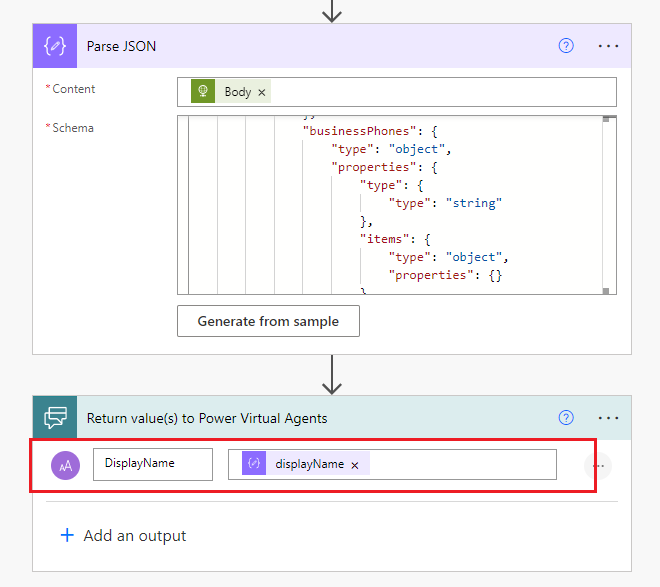
16. Give DisplayName in the Enter Title box. Then in the value, you will select from the Parse JSON output in the Dynamic content.
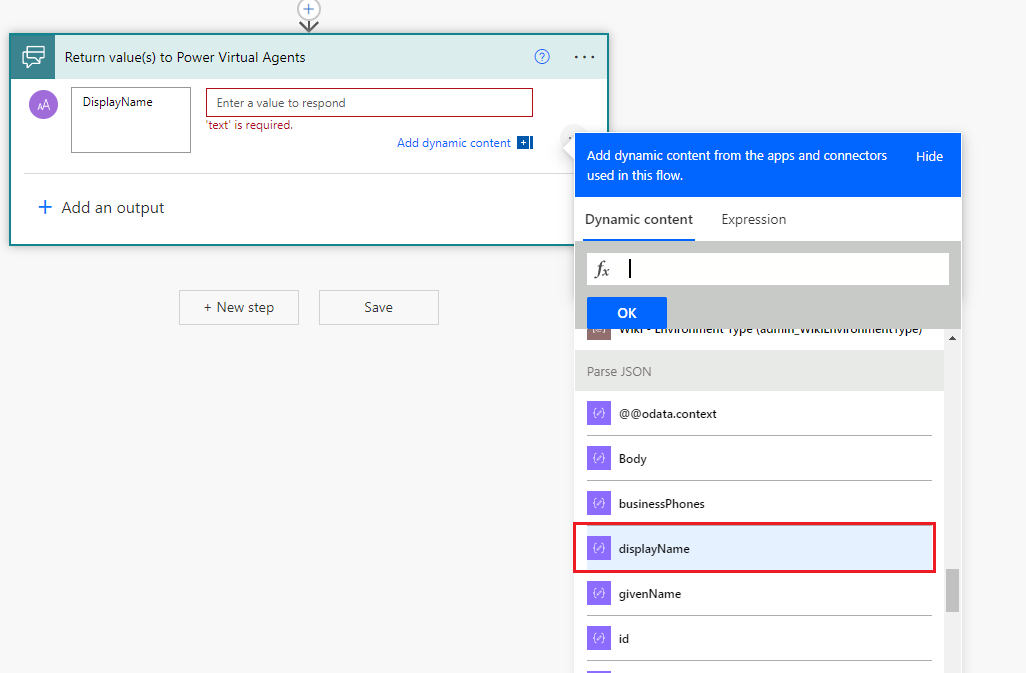
17. In the value field, Choose displayName from the Dynamic Content.
18. Add another Text input and repeat these steps, creating the display name Email and choose mail from the Dynamic content.
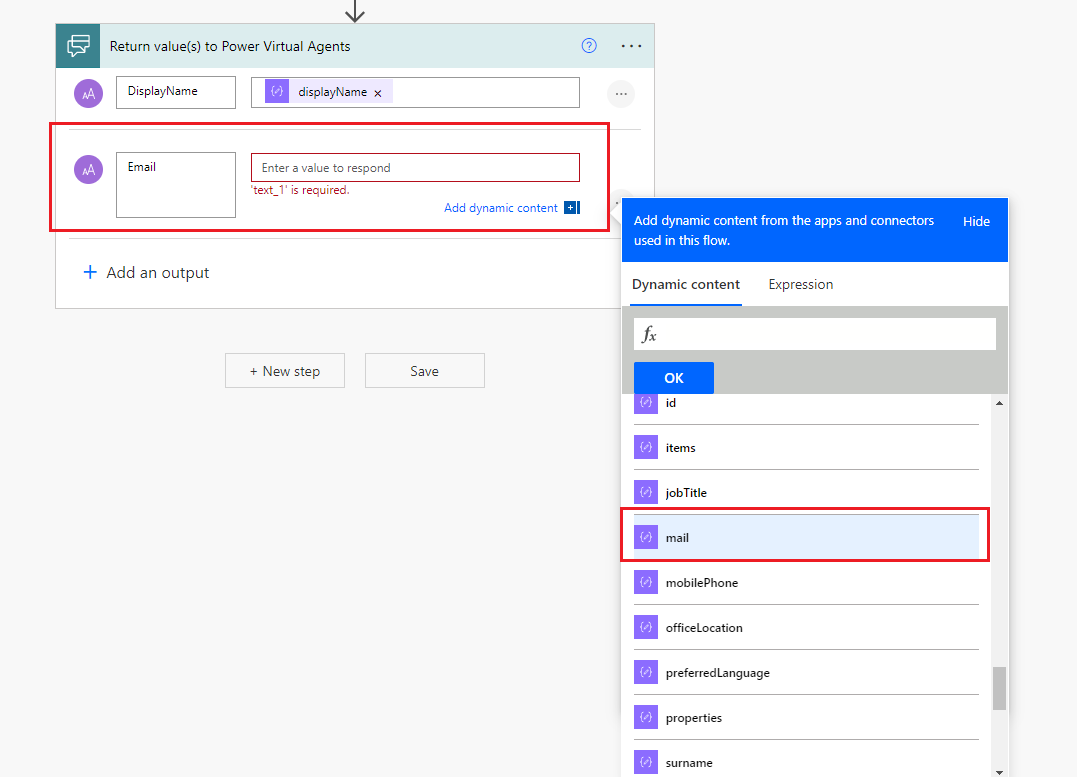
19. In the value field, Choose mail from the Dynamic Content.
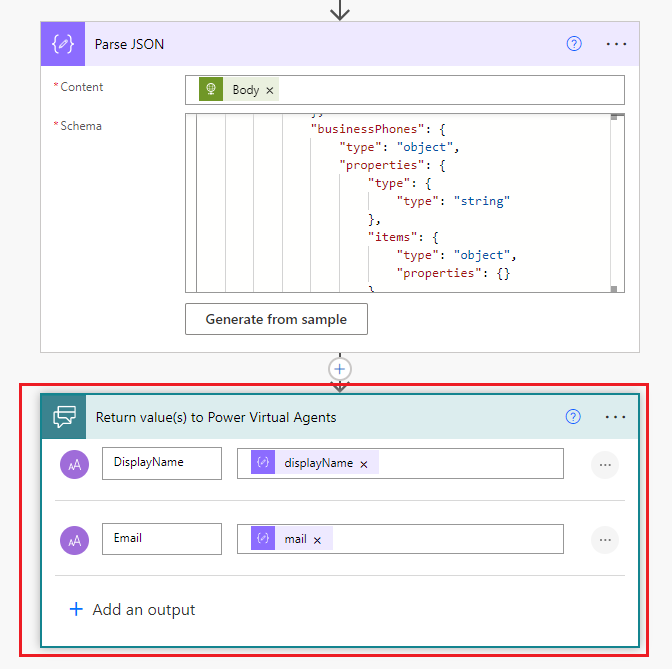
20. Click On Save to Save the Power Automate flow.
Hope you learn something, Thanks for Reading 📖!
Happy Power365ing!
